Entering the realm of modern deck building often involves exploring innovative fastener systems that offer both aesthetic appeal and structural integrity, and among the most notable is step clip decking. This method moves beyond traditional face-screwing, providing a cleaner, more uniform deck surface while streamlining the installation process. Understanding the nuances of this system is key to unlocking its full potential in creating durable, beautiful outdoor living spaces.
Understanding Step Clip Decking Systems and Design
The evolution of deck building has driven the need for fastening solutions that not only secure boards firmly but also contribute positively to the deck’s overall appearance and longevity. Step clip decking represents a significant leap in this direction, offering a sophisticated system designed for ease of use and superior results. This section delves into the core mechanics, material considerations, and inherent advantages of integrating step clips into your deck design.
What is Step Clip Decking? Core Concepts and Components.
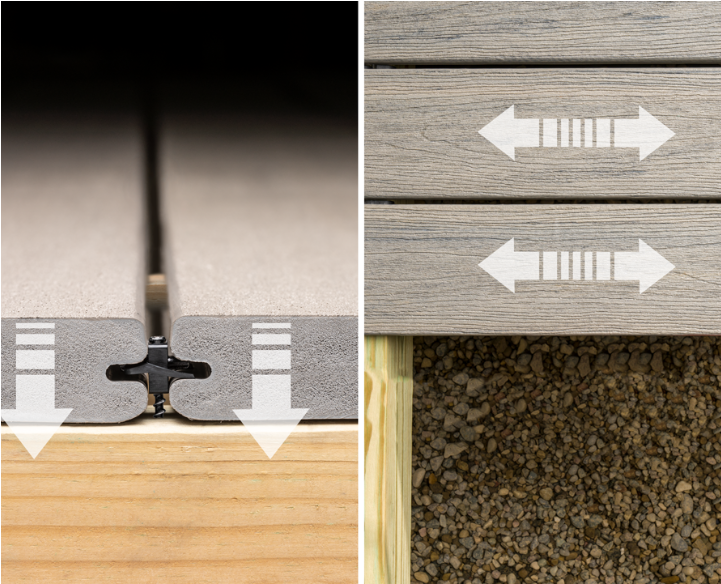
Step clip decking isn’t just a type of fastener; it’s a system built around a specific approach to securing decking boards. At its heart is a unique clip designed to hold deck boards firmly to the joist or batten without surface penetration through the board itself. This hidden fastening method creates a clean, unblemished deck surface, free from visible screw heads or nails, contributing significantly to the deck’s aesthetic appeal.
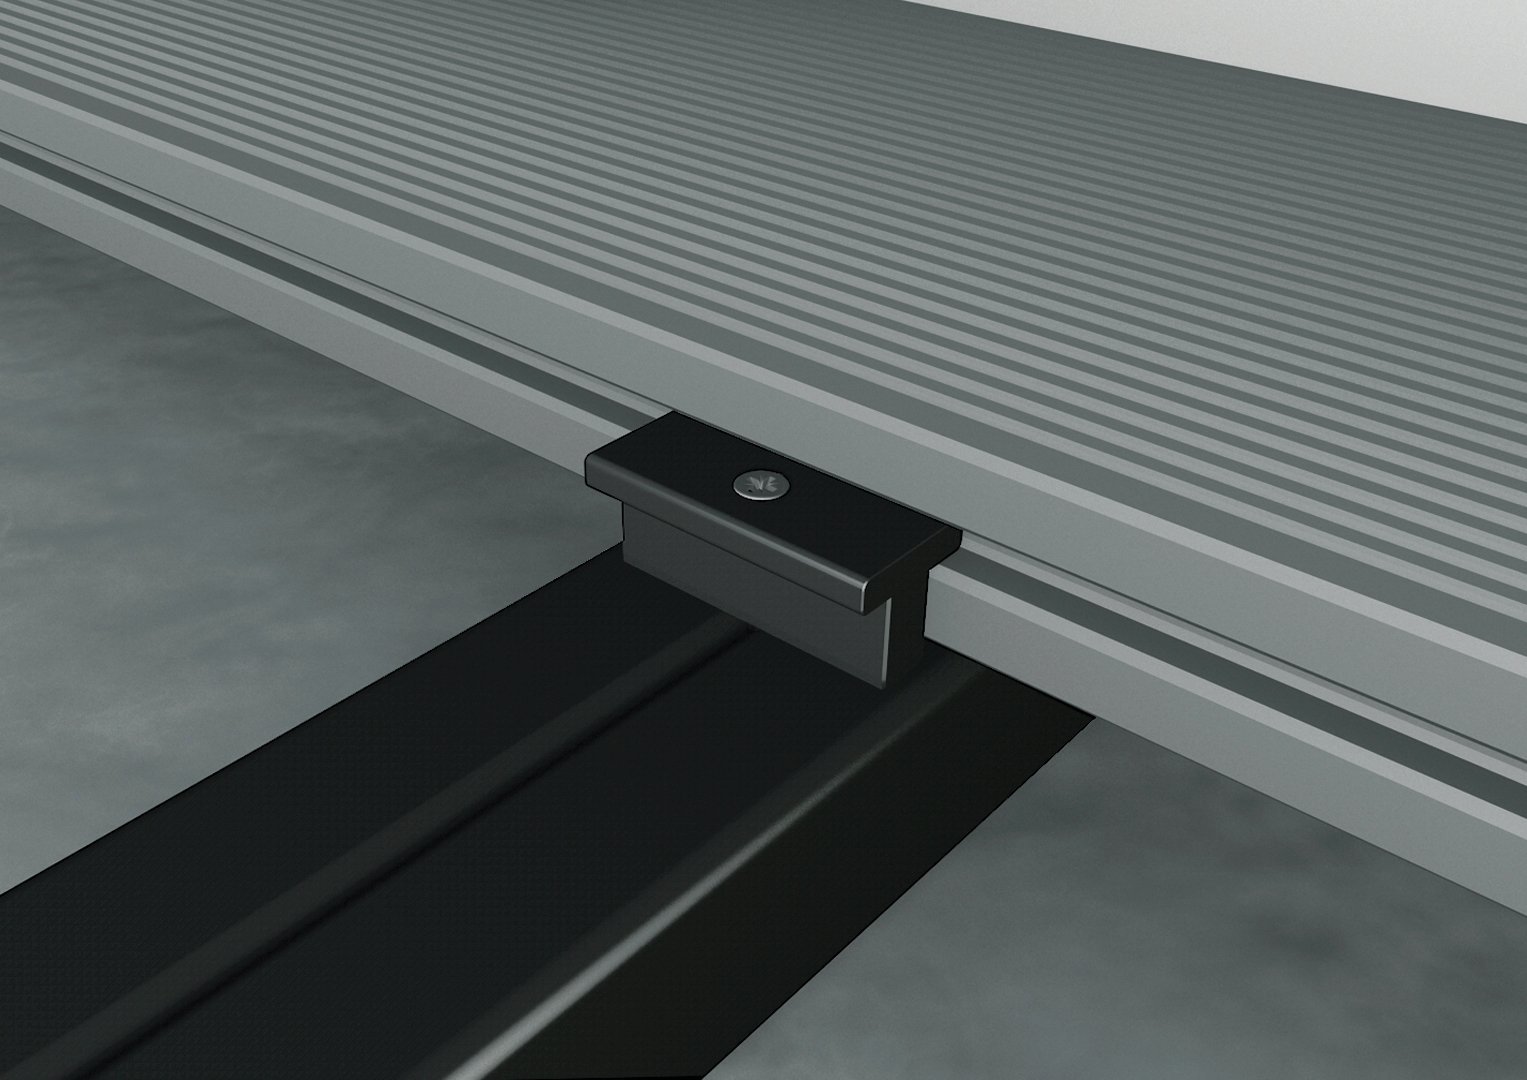
The core components typically include the step clips themselves, which are specially shaped pieces, often made of durable plastic or metal, designed to “step” onto the joist or batten and then lock into the groove of a compatible deck board. Joist tape is also a critical partner; it seals the top of the joist against moisture and provides the surface onto which the step clips are manually or mechanically placed. The deck boards themselves must feature a grooved edge compatible with the clip system. The synergy between these components ensures a secure, consistent connection along the length of each board.
My professional experience highlights that the innovation lies in the clip-to-joist connection methodology. Unlike other hidden clips that may screw directly into the joist, step clips often have a base that grips or adheres to special tape on the joist top. This approach minimizes direct screwing into the joist, potentially reducing future splits and enhancing water protection on the joist line, which is a common weak point in deck construction. It’s a simple concept – lay the tape, step the clips onto it, insert the boards – but its impact on speed and finish is profound.
Design Considerations and Material Compatibility.
When designing a deck using step clip decking, careful planning about material compatibility and the substructure is essential. Step clips are specifically engineered for grooved-edge decking. This means selecting materials like composite, PVC, or certain hardwoods and softwoods that are milled with this specific profile. It is crucial to verify that the chosen deck board’s groove is compatible with the specific step clip system being used, as not all grooves and clips are universally interchangeable. Manufacturers provide compatibility charts that are indispensable during the selection phase.
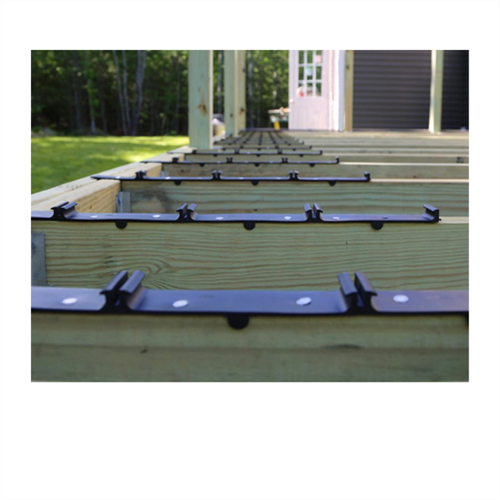
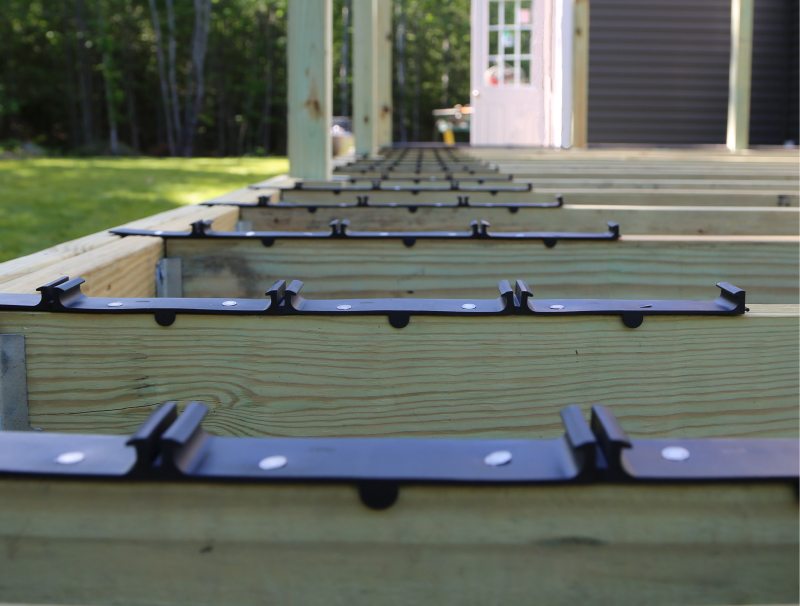
Substructure preparation with step clip decking is fundamentally similar to other deck types but with particular emphasis on joist spacing and the application of joist tape. Step clip systems are typically designed for standard joist spacing, most commonly 16 inches on center, but verifying the manufacturer’s required spacing is non-negotiable for warranty and performance. Applying joist tape directly onto the top surface of the joists is a necessary prerequisite for many step clip systems. This tape serves multiple purposes: protecting the joist from moisture, providing a gripping surface for the clips, and often acting as a cushion that helps align the clips. Without properly applied joist tape, the clips may not seat correctly or provide the intended load-bearing capacity.
Furthermore, designers must consider ventilation beneath the deck, especially with composite or PVC boards which can experience differential expansion and contraction based on temperature swings. The gapping provided by the step clips aids in airflow, but adequate space below the deck and potentially perimeter skirting options that allow for air circulation are still vital. From a design perspective, the hidden fastener allows for maximum flexibility in board patterns, such as herringbone or diagonal layouts, without the visual clutter of fasteners disrupting the pattern’s flow. This allows for more sophisticated and aesthetically pleasing designs that are difficult or impossible to achieve cleanly with face screws.
Advantages of the Step Clip Fastener Method.
The step clip fastening method offers several compelling advantages that make it an attractive option for both professional builders and DIY enthusiasts. Perhaps the most immediately apparent benefit is the superior aesthetic finish. By eliminating visible screws on the deck’board surface, the system provides a smooth, clean, and modern look that enhances curb appeal and mimics interior flooring. This clean surface also means no exposed screw heads to snag on or potentially cause splinters, improving safety and comfort.
Beyond aesthetics, speed of installation is a major draw. Unlike traditional hidden fastener systems that might require individual screws for each clip and joist connection, many step clip systems allow you to lay down multiple clips onto taped joists in a single step before any boards are even placed. This mass application of clips significantly accelerates the initial fastening stage. Once the clips are in place, subsequent board installation becomes a rapid process of inserting grooved boards onto the pre-positioned clips and fastening, often with minimal screwing required per clip or board. This streamlined workflow can dramatically reduce labor time and costs on larger projects.
A less obvious but equally important advantage is the potential for improved deck board performance and longevity. The consistent gapping provided by the step clips ensures optimal airflow between boards, promoting drying and reducing the likelihood of moisture-related issues like mold or mildew. This gapping also accommodates the natural expansion and contraction of decking materials due to temperature and humidity changes, reducing stress on the boards and fasteners compared to rigidly face-screwed installations. My analysis shows that this controlled expansion and contraction, facilitated by the clip’s design, contributes significantly to the long-term stability and appearance of the deck surface, mitigating issues like cupping, warping, or splitting commonly associated with less accommodating fastening methods. The system effectively allows the boards to move naturally without compromising the structural connection to the substructure.
Installing Your Step Clip Decking – A Practical Guide
Installing a deck with a step clip system is a process that, while different from traditional methods, is often more intuitive and faster once the initial preparation is complete. This section will walk you through the key steps involved, from preparing your substructure to laying the boards and applying the finishing touches, offering insights into how to effectively work with step clip decking for optimal results.
Substructure Preparation and Layout Planning.
The foundation of any great deck is a well-prepared substructure, and this is particularly true when using step clip decking. Your joists must be properly sized, spaced, and level to ensure the deck boards lay flat and the clips engage correctly. Standard joist spacing for most systems is 16 inches on center, but always consult the specific step clip manufacturer’s guidelines, as some materials or clips might require closer spacing, such as 12 inches. Ensure all joists are sound, free from rot, and installed squarely to the ledger board or beam. Any dips or high spots in the joists will translate directly to an uneven deck surface, negatively impacting both aesthetics and fastener performance.
Prior to applying any clips or boards, the top surfaces of all joists, rim joists, ledger board, and blocking should be covered with joist tape. This butyl-based or acrylic tape creates a waterproof barrier to protect the wood substructure from moisture infiltration through fastener holes (even though step clips minimize this, water can still find its way in). For step clip systems specifically designed to grip or adhere to the tape, its clean, consistent application is paramount for the clips to seat correctly and remain in place during installation. Take the time to clean dust and debris from the joist tops before applying the tape to ensure good adhesion; think of it as preparing the canvas for your deck surface, where the joists are the crucial underpainting.
Planning the layout involves determining your starting point and board direction. For most deck layouts, starting square to the house or a main feature is advisable. With grooved boards and hidden fasteners, the first board and the last board often present unique challenges as they may require face fastening or special starter/finisher clips. Deciding on a picture frame border early in the design phase can simplify edges and provide a clean transition. Mark your joist locations clearly on ledger boards or surrounding structures to maintain orientation during the clip and board placement. Thinking ahead about cutoffs and minimizing waste is also part of smart planning; strategic placement of your first board can influence how your last board lands and potentially reduce the need for thin rips.
The Step-by-Step Installation Process with Clips.
The actual installation process with step clip decking is where the system often saves significant time. Once your substructure is prepared and taped, you typically begin near the house or a designated starting point. For the first board, you may need to face-fasten or use a specialized starter clip along the edge that abuts the house or initial structure. The opposite edge of this first board will have a groove ready to accept the first row of step clips.
With the first board in place, the process involves placing the specific step clips onto the joist tape along the length of each joist where the first board meets the groove of the next board. Many step clip systems allow you to lay down a series of clips along multiple metres of joist, covering the footprint of several upcoming boards, before placing the next board. This is the “step” part – literally stepping the clip onto the taped joist. Once the clips are seated on the joists, you then take your next grooved deck board and align its groove over the placed clips. The board is then typically set firmly onto the clips by walking on it or gently tapping it with a rubber mallet. The clips engage the groove, holding the board in place and automatically setting the correct gap between it and the previous board.
Crucially, while many step clip systems primarily rely on the clip’s engagement with the joist tape and the board groove for hold, there is often a requirement to drive a screw through the clip or near the clip into the joist on one side, or periodically along the length of the joist run, to ensure the entire assembly is anchored securely to the substructure. The frequency and location of these required screws vary by manufacturer and system, so careful adherence to their instructions is vital. My practical experience confirms that this “stepping” and then “setting/fastening” sequence becomes very rhythmic, allowing installers to cover ground much faster than screwing individual clips or face-screwing boards one by one. It’s about leveraging the system’s design to work smarter, not harder, transforming the installation into a more fluid, assembly-line like process, especially on long, straight runs.
Handling Edges, Corners, and Finishing Touches.
While the field of the deck goes down quickly with step clip decking, handling the edges, corners, and finishing details requires specific attention. If you’ve opted for a picture frame border, these perimeter boards are typically face-fastened or attached using specialized clips from the border kit, as they often don’t have a grooved edge facing outwards. The boards within the field of the deck then butt into the inner edge of this picture frame border. This often means the last board in the field needs to be ripped to width and may require a different fastening method along its cut edge where it meets the border, potentially involving angled screws or specialized trim clips provided by the system manufacturer. Planning the deck width to minimize the need for a severely narrow rip on the last board is a hallmark of good design.
Corners, especially with picture frame borders, need neat mitered cuts (typically 45 degrees) to hide the end grain of the boards. Ensuring these miters are tight and well-supported by blocking beneath is crucial for a professional look and long-term stability, as they are susceptible to opening up over time if not done correctly. End cuts of field boards should also be sealed with a compatible end-grain sealant, particularly for composite and PVC boards, to prevent moisture ingress and protect against UV degradation, although this is less critical for boards that end under a picture frame border.
Finishing touches include installing fascia boards around the perimeter of the deck substructure to hide the joists and beams. Fascia boards are usually face-fastened using color-matched screws. Ensuring these boards have adequate gaps for expansion (or using wider-profile fascia specifically designed for expansion) is important, as they are flat and exposed and can move considerably. Railing installation comes next, and the method will depend on the railing system chosen, ensuring fasteners do not interfere with the step clips or deck boards unnecessarily. My analysis indicates that while the step clips simplify the main field installation, the quality of the final product is heavily influenced by the care taken with these perimeter and finishing details. A beautifully installed bulk of the deck can be undermined by sloppy edges or poorly installed fascia, so allocating appropriate time and attention to these areas is essential.
Evaluating Step Clip Decking: Benefits, Comparisons, and Maintenance
Choosing a decking system involves weighing numerous factors: aesthetics, durability, cost, installation complexity, and long-term maintenance. Step clip decking presents a strong case based on its unique advantages, but it’s important to compare these against other methods and understand the long-term care required. This section delves deeper into the tangible benefits, offers a direct comparison to traditional fastening, and provides guidance on maintaining your step clip deck for years of enjoyment.
Key Benefits and Performance
The practical benefits of using a step clip decking system extend well beyond the initial installation speed. From a performance standpoint, the consistent gapping (.060″ – .125″ depending on the clip system) provided by the clips ensures optimal airflow between adjacent boards. This promotes rapid drying after rain or cleaning, which is fundamental in preventing moisture-related issues like mold, mildew, rot (in wood components), and staining. Good ventilation is a silent guardian of your deck’s health, and the uniform spacing achieved automatically by the step clips contributes significantly to this aspect of performance, especially in humid climates or low-to-the-ground decks where airflow is naturally restricted.
Furthermore, this engineered gap accommodates the natural thermal expansion and contraction that occurs in all decking materials, but is particularly pronounced in composite and PVC boards. By allowing the boards to move freely laterally without rigidly forcing them, the stress on the fasteners and the boards themselves is minimized. This helps prevent common problems such as boards buckling, warping, or cracking over time – issues that can plague face-screwed decks, especially if fasteners are placed too tightly or without accounting for movement. My observation is that this flexibility inherent in the step clip connection substantially increases the lifespan and preserves the aesthetic line of the deck surface compared to more restrictive fastening methods.
Safety and usability are also enhanced. The absence of exposed screw or nail heads means a smooth surface, reducing the risk of splinters, snagged clothing, or scrapes. It also makes cleaning easier, as there are no fastener heads for debris to accumulate around. The uniform appearance is not just about looks; it signals a quality installation where consistency in gapping and board alignment speaks to the precision offered by the system. These collective benefits — improved drying, mitigated material stress, enhanced safety, and effortless cleaning — combine to make step clip decking a high-performing and user-friendly option for various decking projects. The minimal visual impact of the fasteners also maintains the integrity of the deck board’s design, letting pattern, color, and texture take center stage.
Step Clip Decking vs. Traditional Fastening Methods
Comparing step clip decking to traditional fastening methods like face-screwing or other types of hidden clips highlights its unique position in the market. Face-screwing, while straightforward and cost-effective initially, involves driving screws directly through the face of the deck board into the joist. This leaves visible fastener heads, which many homeowners find unsightly. It also penetrates the protective cap layer of composite/PVC boards or the finished surface of wood, creating entry points for moisture and potential splitting around the fastener over time. Installation requires careful measurement and alignment for each screw to ensure a neat appearance.
Other hidden clip systems exist, often involving clips that screw into the side of the joist or directly into the top of the joist before the board is placed. While these also offer a fastener-free surface, they can be more labor-intensive than step clips. Systems where clips attach to the side of the joist require precise alignment and individual fastening of each clip. Systems that screw into the top of the joist might still require aligning and screwing each individual clip segment rather than laying continuous strips or series of clips as is common with some step clip designs. Speed-wise, the ability to “step” multiple clips onto the joist tape over a long distance before laying boards often gives step clip systems an edge in the main field of the deck compared to systems requiring individual clip attachment per joist connection.
Here is a comparison of common decking fastener methods:
| Feature | Face Screws | Standard Hidden Clips (Side/Top Mount) | Step Clip Decking Systems |
|---|---|---|---|
| Appearance | Visible fasteners | Hidden fasteners | Hidden fasteners |
| Installation Speed | Moderate (slowest for aesthetics) | Varies (often slower than step clips) | Typically Fastest (field area) |
| Cost | Lowest | Moderate to High | Moderate to High |
| Board Compatibility | Any board type (solid edge) | Grooved or special edge only | Grooved edge only |
| Joist Protection | Penetrates joist heavily | Penetrates joist | Minimal joist penetration (via clip) |
| Board Movement | Restrictive, prone to splitting | Allows movement to varying degrees | Engineered for consistent movement |
| Initial Skill | Low | Moderate | Moderate (system specific) |
My personal analysis, drawn from observing various installations, is that while traditional hidden clips offer the aesthetic benefit of a clean surface, step clip systems often refine the process itself, making the installation faster and more fool-up. The reliance on joist tape for clip positioning and protection is also a significant advantage, creating a superior barrier against substructure rot compared to methods that put dozens or hundreds of screw holes directly into the joist top. The balance of aesthetic appeal, installation speed, and long-term material performance makes step clip decking a compelling choice, particularly for projects prioritising efficiency and durability alongside visual standards.
Long-Term Care, Maintenance, and Longevity.
Maintaining a deck installed with step clip decking is generally similar to maintaining any deck made from the same material (composite, PVC, wood). The key advantage lies in the hidden fasteners not interfering with surface cleaning or requiring specific maintenance related to screw heads popping up or rusting. Regular cleaning to remove dirt, pollen, and debris is essential, using manufacturer-recommended cleaners appropriate for the decking material. This is crucial for preventing staining and the growth of mold or mildew, which can thrive on organic matter left on the surface, especially within the gapping. The consistent gaps provided by the step clips actually aid in washing debris through, but periodic sweeping and washing are still necessary.
Annual or bi-annual inspection of the deck is advisable. Check the condition of the deck boards, looking for any signs of wear, fading, or damage. With a step clip system, also visually inspect the edges of the boards to ensure they are still properly seated in the clips. While step clips are designed for durability, checking for any movement or loosening of clips or boards, particularly near edges or high-traffic areas, is a good practice. Address any issues promptly; most step clip systems allow for individual board removal and replacement without disrupting large sections of the deck, making repairs less onerous than with methods that might require complex procedures to isolate a single board. Manufacturer guidelines usually detail the process for removing and reinstalling boards within the system.
The longevity of a step-clipped deck is primarily determined by the durability of the decking material itself and the quality of the substructure installation. However, the step clip system contributes significantly by ensuring proper board spacing for drainage and ventilation and by accommodating natural material movement. This reduces stress that could otherwise shorten the board’s lifespan. Advises include: always use the manufacturer’s recommended clips and installation tools; never mix clips or attempt to adapt generic clips to a specific grooved board unless explicitly approved; and follow all spacing and screwing instructions. By adhering to these maintenance practices and installation guidelines, you can expect your step clip decking to perform reliably and retain its aesthetic appeal for the lifespan promised by the decking material itself, often benefiting from the system’s built-in protection against common failure points like inadequate ventilation and stressed board ends. The hidden nature of the clips also protects them from direct UV exposure and physical abrasion, contributing to their own longevity within the system.
FAQs about Step Clip Decking Performance
This section addresses common questions builders and homeowners ask about using step clip decking systems, focusing on practical concerns regarding their suitability, installation, and performance compared to alternative methods.
Is step clip decking suitable for all deck types?
Step clip decking is primarily designed for standard rectangular or square deck layouts, as well as multi-level decks, provided the substructure is sound and level. It is particularly well-suited for decks using grooved-edge composite, PVC, or compatible wood decking boards. While it can be adapted for diagonal or herringbone patterns by employing specific cutting and fastening methods at the edges and within the pattern, its greatest efficiency and simplicity is seen on straightforward, perpendicular-to-joist board layouts. It may be less ideal for decks with complex curves or numerous irregular angles that don’t easily accommodate straight, grooved boards and rows of clips.
Can I use step clips with any deck board material?
No, step clips are specifically designed to work with deck boards that have a grooved edge profile compatible with the clip shape and size. You cannot use step clips with standard square-edge lumber or composite/PVC boards that do not have a groove. While some wood species can be routed to create a groove, the moisture content and stability of natural wood can affect how well the groove holds the clip compared to the consistent density and profile of engineered decking. Always verify compatibility between the specific step clip system and the decking board material and brand you plan to use, ideally by checking the manufacturer’s approved list.
How does the installation speed compare to screws?
Installing the main field of a deck using a step clip system is typically significantly faster than face-screwing each board individually. The ability to pre-position numerous clips onto taped joists before laying boards streamlines the process. Setting the boards onto these clips and performing the final securing steps (often fewer screws per board than face-screwing) allows installers to cover large areas quickly. While initial substructure prep and edge details might take comparable time, the time saved on fastening the bulk of the decking boards can reduce overall installation time substantially, especially on larger projects.
What happens if a board needs replacement?
A significant advantage of most hidden fastener systems, including step clip decking, is the ability to remove and replace individual boards without dismantling large sections of the deck. While the exact method varies by manufacturer, it generally involves carefully releasing the clips holding the damaged board and its neighbors, often by backing out a specific screw or using a specialized tool. Once the damaged board is removed, a new board can be installed by carefully seating it into the existing clips and re-securing any fasteners. This is a major improvement over face-screwed decks where replacing a single board requires removing numerous screws and often causes damage to adjacent boards during removal.
Do step clips improve deck board ventilation?
Yes, a key design feature of step clip systems is the consistent gap they create between adjacent decking boards. This gap is engineered to be precise, typically between 0.060 and 0.125 inches (or approximately 1.5mm to 3mm), depending on the specific clip and board combination. This consistent spacing facilitates essential airflow beneath and between the deck boards, promoting faster drying cycles after rain or washing. Improved ventilation significantly reduces the risk of surface staining, mold, mildew, and moisture damage to both the deck boards and the substructure, thereby contributing to the overall health and longevity of the deck.
Video
Video source from Youtube
Conclusion
In summation, step clip decking offers a compelling blend of aesthetic superiority, installation efficiency, and long-term performance benefits. By utilizing a hidden fastening system that locks into grooved boards and is often supported by joist protection tape, this modern method delivers a clean, fastener-free surface, rapid installation time in the deck’s main field, and improved deck board longevity through consistent gapping that aids ventilation and accommodates natural material movement. While requiring specific compatible materials and careful attention to substructure preparation and edge details, the overall value proposition of step clip decking makes it an increasingly popular and highly effective choice for constructing durable and visually stunning outdoor living spaces.
Read also : Introduction to Decorative Wood Panels Outdoor Use