Master the art of installing french oak laminate flooring with our comprehensive tutorial. Achieve a stunning, high-end look in your home.
Installing laminate flooring can be a rewarding DIY project, offering a beautiful and durable finish. French Oak laminate flooring is a popular choice due to its aesthetic appeal and resilience.
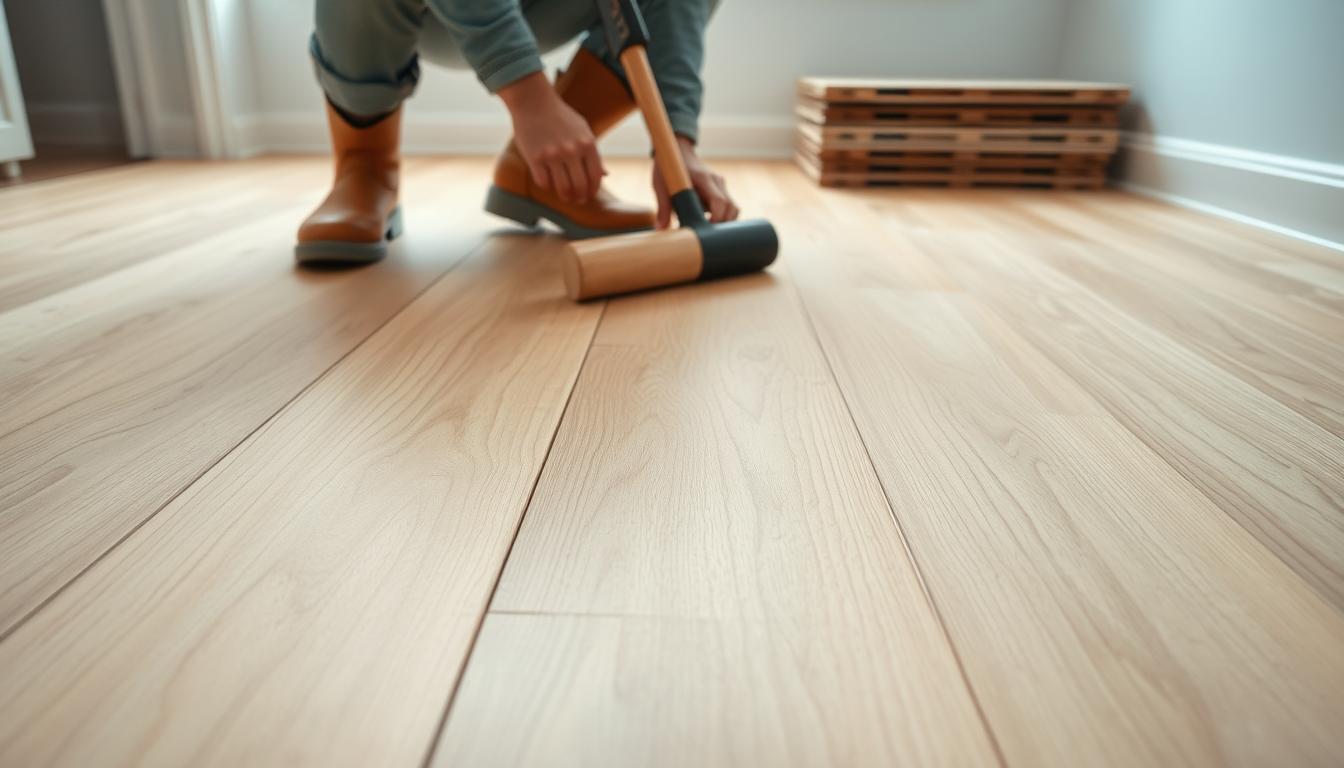
Our comprehensive guide will walk you through the process, from preparation to completion, ensuring a professional-looking result. With the right tools and a bit of patience, you can achieve a stunning laminate flooring installation that enhances your home’s beauty and value.
Key Takeaways
- Understand the basics of laminate flooring installation.
- Learn how to prepare your subfloor for laminate flooring.
- Discover the tools needed for a successful installation.
- Follow a step-by-step guide to laying French Oak laminate.
- Tips for achieving a professional-looking finish.
Why Choose French Oak Laminate Flooring
The appeal of French Oak laminate flooring lies in its ability to combine the beauty of natural wood with the durability of modern laminate technology. This flooring option has gained popularity for its numerous benefits, ranging from its aesthetic appeal to its cost-effectiveness.
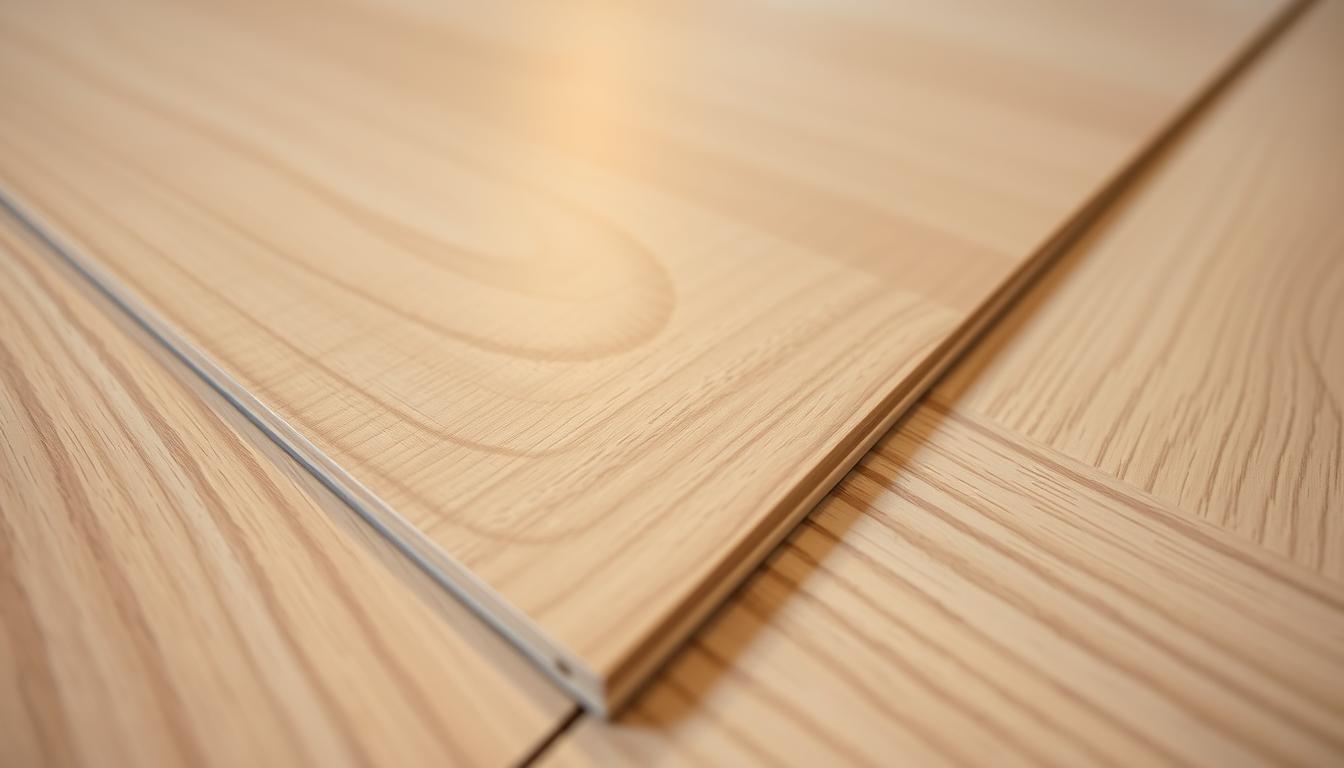
The Aesthetic Appeal of French Oak
French Oak laminate flooring is renowned for its rich, warm tones and distinctive grain patterns. It brings a touch of elegance and sophistication to any room, making it a versatile choice for various interior designs. Whether you’re aiming for a traditional, rustic look or a modern, sleek aesthetic, French Oak laminate can complement your decor.
Durability and Performance Benefits
One of the significant advantages of laminate flooring is its durability. French Oak laminate is resistant to scratches, fading, and moisture, making it an ideal choice for high-traffic areas and homes with pets or children. Its performance benefits also include ease of maintenance, as it requires less upkeep compared to solid hardwood flooring.
Cost Comparison with Solid Hardwood
| Flooring Type | Cost per Square Foot | Installation Cost |
|---|---|---|
| French Oak Laminate | $2 – $4 | $0.50 – $1.50 |
| Solid Hardwood | $5 – $10 | $2 – $5 |
As shown in the table, French Oak laminate flooring is significantly more cost-effective than solid hardwood, both in terms of material cost and installation expenses. This makes it an attractive option for homeowners on a budget.
Essential Tools and Materials for Installation
To ensure a smooth and efficient installation, it’s essential to have the right tools and materials at your disposal. Installing French Oak laminate flooring can be a rewarding DIY project if you’re well-prepared.
Must-Have Tools for DIY Installation
Having the correct tools is crucial for a successful laminate flooring installation. Here are the tools you’ll need, categorized for ease:
Measuring and Marking Tools
- Tape Measure: For measuring rooms and individual planks.
- Pencil and Marker: For marking cuts and layouts.
- Square: Ensures your cuts and layouts are square and accurate.
Cutting and Installation Tools
- Utility Knife or Laminate Cutter: For cutting laminate planks to size.
- Pull Bar: Helps in fitting the last row of planks into place.
- Tapping Block: Used to tap planks into place without damaging them.
Materials Checklist and Quantities
Before starting your project, ensure you have all the necessary materials. This includes:
- French Oak Laminate Flooring: Calculate the total square footage of your room, adding 10% for cuts and waste.
- Underlayment Material: Depending on the type, this could be foam, cement-based, or another material recommended by the manufacturer.
- Transition Strips: For transitions between different flooring types or rooms.
Safety Equipment You Shouldn’t Skip
Safety should be a top priority during your DIY laminate flooring installation. Essential safety equipment includes:
- Knee Pads: To protect your knees during the installation process.
- Safety Glasses: Protects your eyes from debris when cutting.
- Dust Mask: Prevents inhalation of dust during cutting and sanding.
By having the right tools and materials, you’ll be well on your way to a successful DIY laminate flooring installation. For more laminate flooring tips, consider consulting manufacturer guidelines and DIY resources.
Preparing Your Space for French Oak Laminate Flooring
Proper preparation of your space is key to a successful French Oak laminate flooring installation. This process involves several critical steps that ensure your new flooring goes in smoothly and looks great.
Removing Existing Flooring
The first step in preparing your space is to remove the existing flooring. This could be old laminate, hardwood, carpet, or tile. Removing the old flooring allows you to inspect the subfloor for any damage or debris that needs to be addressed before the new flooring can be installed.
- Carefully pry up the old flooring to avoid damaging the subfloor.
- Remove all old adhesive or debris.
- Inspect the subfloor for any damage or unevenness.
Acclimating Your Laminate Properly
Acclimating your French Oak laminate flooring is crucial for a successful installation. This process allows the flooring to adjust to the temperature and humidity of your home.
Temperature and Humidity Considerations
The ideal temperature for acclimation is between 65-75°F (18-24°C), with a humidity level between 35-65%. Ensuring your laminate is acclimated in a room with stable conditions is vital.
Recommended Acclimation Time
Most manufacturers recommend acclimating your laminate flooring for at least 48 hours. However, it’s best to check the specific recommendations provided with your flooring.
Clearing and Preparing the Room
Clear the room of all furniture, fixtures, and any other obstructions. This will give you a clear workspace and prevent any damage to your belongings during the installation process.
By following these steps, you’ll be well-prepared to install your French Oak laminate flooring, ensuring a professional-looking result that will last for years to come.
Subfloor Assessment and Preparation
Before installing French Oak laminate flooring, it’s crucial to assess and prepare the subfloor. A well-prepared subfloor is essential for a successful and long-lasting installation.
Checking for Moisture Issues
Moisture can significantly affect the integrity and appearance of your laminate flooring. To check for moisture issues, you can perform a simple test using a moisture meter. This device measures the moisture levels in your subfloor, helping you identify potential problems.
Moisture Test Results Interpretation:
| Moisture Level | Interpretation | Action Required |
|---|---|---|
| Low (< 4%) | Subfloor is dry | No action needed |
| Moderate (4-6%) | Subfloor has some moisture | Apply moisture barrier |
| High (> 6%) | Subfloor is too damp | Address source of moisture before proceeding |
Leveling Uneven Surfaces
Uneven subfloors can lead to poor laminate flooring installation. To level the surface, use a self-leveling compound or patching compound, following the manufacturer’s instructions.
“A level subfloor is crucial for preventing laminate flooring from creaking or buckling.”
Cleaning and Prepping the Subfloor
Thoroughly clean the subfloor to remove dirt, dust, and old adhesive. Ensure the subfloor is dry and free of debris before proceeding with the installation.
Video source from Youtube
Installing Moisture Barrier and Underlayment
A moisture barrier protects your laminate flooring from moisture damage, while underlayment provides a smooth surface and additional comfort underfoot. Choose products that are compatible with your French Oak laminate flooring.
By carefully assessing and preparing your subfloor, you can ensure a successful laminate flooring installation that will last for years to come.
Planning Your Layout for Professional Results
A well-planned layout is the foundation of a successful laminate flooring installation. To achieve professional-looking results, it’s crucial to consider several key factors before you start laying your French Oak laminate flooring.
Determining the Best Direction for Planks
The direction in which you lay your laminate planks can significantly impact the overall appearance of the room. Typically, it’s recommended to install laminate flooring parallel to the longest wall in the room or in the direction of the main light source to create a more natural look.
- Parallel to the longest wall to create a sense of spaciousness
- In the direction of the main light source to minimize the visibility of joints
Creating an Effective Staggered Pattern
A staggered pattern is essential for a visually appealing laminate flooring installation. This involves ensuring that the joints between planks in adjacent rows are not aligned. A minimum offset of 6 inches is recommended.
Tips for a successful staggered pattern:
- Start with a full plank in one corner and work your way across the room
- Use a random length pattern or a specific offset to avoid alignment
Measuring and Marking Your Starting Line
Accurate measurement and marking are critical for a straight and even installation. Measure the width of the room and calculate the center point to determine your starting line.
Planning for Transitions Between Rooms
Transitions between rooms can be challenging. Planning ahead by deciding on the type of transition strips or thresholds you’ll use can help ensure a smooth and professional finish.
By carefully planning your layout, you can achieve a beautiful and professional-looking French Oak laminate flooring installation that enhances the overall aesthetic of your home.
Step-by-Step Installation of French Oak Laminate Flooring
By following a step-by-step approach, you can ensure a smooth and successful installation of your French Oak laminate flooring. This process involves several key steps, from preparing your first row to cutting planks for a perfect fit.
Starting Your First Row Correctly
The first row sets the foundation for your entire laminate flooring installation. It’s crucial to start correctly to ensure a professional-looking finish.
Using Spacers for Expansion Gaps
Begin by placing spacers between the laminate planks and the wall. These spacers create an expansion gap, which is essential for allowing the flooring to expand and contract with temperature changes. Typically, a 1/4 inch spacer is recommended.
Securing the First Row
To secure the first row, start by laying the first plank along the longest wall in the room, ensuring it’s aligned with your starting line. Use a tapping block and a hammer to tap the planks into place gently. For the first row, you may need to cut the final plank to fit. Use a pull bar to ensure it’s snug against the previous plank.
Connecting Subsequent Rows
Once the first row is in place, you can begin installing subsequent rows. This involves using the click-lock installation technique and maintaining a staggered pattern.
Click-Lock Installation Technique
The click-lock system is designed to make laminate flooring installation easier and faster. To connect a plank, angle it slightly, click it into place, and then lower it down. You should hear a distinct ‘click’ as it locks into position. Ensure the planks are snug and flush.
Maintaining Proper Staggering
To enhance the appearance and durability of your laminate flooring, maintain a staggered pattern by ensuring that the joints of adjacent rows are not aligned. A minimum offset of 6 inches is typically recommended.
Cutting Techniques for Perfect Fits
Cutting laminate planks to fit around obstructions or along the room’s edges requires precision. Two common techniques involve using a jigsaw for irregular cuts and a miter saw for straight cuts.
Using a Jigsaw for Irregular Cuts
A jigsaw is ideal for cutting around door frames, heating vents, or other irregular obstructions. Use a fine-toothed blade to minimize chipping and ensure a smooth cut.
Making End Cuts with a Miter Saw
For straight cuts, a miter saw is the tool of choice. It allows for precise angled cuts, which is particularly useful for cutting planks to fit at the end of a row or around door casings.
By following these steps and techniques, you can achieve a professional-looking French Oak laminate flooring installation that enhances the beauty and value of your home.

Navigating Challenging Installation Areas
The key to a flawless laminate flooring installation lies in effectively navigating the challenging areas that can complicate the process. These areas require extra attention and specialized techniques to ensure a professional finish.
Working Around Door Frames and Casings
One of the most common challenges is working around door frames and casings. To achieve a seamless fit, you may need to trim the door casings or use undercut saws to fit the laminate flooring underneath. Precision is crucial to avoid gaps or uneven edges.
Installing Under Radiators and Fixed Objects
Installing laminate flooring under radiators and fixed objects can be tricky. It’s essential to carefully measure and cut the planks to fit around these obstacles. Using a jigsaw or a coping saw can help achieve the necessary precision.
As noted by flooring experts, “The fit around radiators and fixed objects can make or break the overall appearance of the laminate flooring.”
“A well-fitted laminate floor around challenging areas not only enhances the aesthetic appeal but also contributes to the durability of the flooring.”
Handling Stairs and Landings
Stairs and landings present another challenge. To install laminate flooring on stairs, you’ll need to cut the planks to fit each step and riser. Using a stair nosing can provide a finished edge and enhance safety.
Addressing Irregular Room Shapes
Rooms with irregular shapes require careful planning. To tackle this, create a detailed template of the room and use it to guide your cutting. Flexibility and patience are key when dealing with complex geometries.
By addressing these challenging areas with the right techniques and tools, you can achieve a professional-looking laminate flooring installation that enhances the beauty and functionality of your space.
Finishing Touches for Your French Oak Laminate
As you approach the end of your French Oak laminate flooring installation, attention to detail is crucial for achieving a professional finish. The final stages involve several key steps that not only enhance the aesthetic appeal of your new flooring but also ensure its durability and performance.
Installing Baseboards and Quarter Round
One of the critical finishing touches is the installation of baseboards and quarter round molding. These elements cover the expansion gap between the laminate flooring and the wall, creating a seamless transition. Proper installation involves measuring accurately and cutting the molding to fit perfectly around the room.
Adding Transition Strips Between Rooms
Transition strips are essential for connecting your French Oak laminate flooring to other flooring types or between rooms. They come in various styles and materials, allowing you to choose the one that best matches your laminate. Selecting the right transition strip can significantly impact the overall appearance of your flooring.
Sealing Edges in Moisture-Prone Areas
In areas prone to moisture, such as kitchens and bathrooms, sealing the edges of your laminate flooring is vital. This step helps prevent water from seeping under the flooring, thereby reducing the risk of damage. Silicone-based sealants are commonly used for this purpose.
Final Cleaning After Installation
The final step is a thorough cleaning of your newly installed French Oak laminate flooring. This involves removing any dust, debris, or adhesive residue. Using the right cleaning products is essential to maintain the integrity and appearance of your laminate flooring.
| Finishing Touch | Purpose | Key Considerations |
|---|---|---|
| Installing Baseboards and Quarter Round | Covers expansion gap, enhances appearance | Accurate measurement, precise cutting |
| Adding Transition Strips | Connects laminate to other flooring types or rooms | Style, material, color matching |
| Sealing Edges | Prevents water damage in moisture-prone areas | Type of sealant, application technique |
| Final Cleaning | Removes dust, debris, and residue | Choosing the right cleaning products |
Troubleshooting Common French Oak Laminate Issues
Despite its durability, French Oak laminate flooring can sometimes present issues that need to be addressed. Homeowners may encounter problems such as gaps between planks, clicking or hollow sounds, buckling or warping, and minor damage or scratches.
Addressing Gaps Between Planks
Gaps between planks can occur due to improper installation or changes in humidity. To fix this, you can use a laminate floor repair kit to fill in the gaps. Ensure the area is clean and dry before applying the filler.
Fixing Clicking or Hollow Sounds
Clicking or hollow sounds often result from uneven subfloors or improper installation. Check the subfloor for any irregularities and make necessary adjustments. If the issue persists, consider consulting a professional.
Dealing with Buckling or Warping
Buckling or warping can be caused by excessive moisture. Check for any water leaks or high humidity levels. Ensure proper ventilation and consider using a dehumidifier if necessary.
Repairing Minor Damage and Scratches
Minor damage and scratches can be repaired using a laminate floor touch-up kit. For more significant damage, it may be necessary to replace the affected planks. Always follow the manufacturer’s instructions for repair products.
By addressing these common issues, homeowners can maintain the beauty and durability of their French Oak laminate flooring.
Conclusion
Installing French Oak laminate flooring can significantly enhance the aesthetic appeal and durability of your home. By following the steps outlined in this guide, you can achieve a professional-looking result with DIY laminate flooring.
The key to a successful laminate flooring installation lies in proper preparation, including assessing and preparing the subfloor, planning your layout, and using the right tools and materials. French Oak laminate flooring offers a cost-effective and visually appealing alternative to solid hardwood, making it an attractive choice for homeowners.
By understanding how to navigate challenging installation areas and addressing common issues, you can ensure a long-lasting and beautiful floor. With these tips and techniques, you’re well on your way to enjoying the benefits of your new French Oak laminate flooring for years to come.
FAQ
What is the average lifespan of French Oak laminate flooring?
The average lifespan of French Oak laminate flooring is between 15 to 25 years, depending on the quality of the flooring, installation, and maintenance.
Can I install French Oak laminate flooring over existing tile or hardwood?
Yes, you can install French Oak laminate flooring over existing tile or hardwood, but it’s essential to ensure the subfloor is level, clean, and dry. You may need to prepare the subfloor by applying an underlayment or making adjustments to the existing flooring.
How do I maintain my French Oak laminate flooring?
To maintain your French Oak laminate flooring, regularly sweep or vacuum the floor, and damp mop with a laminate floor cleaner. Avoid using excessive water, harsh chemicals, or abrasive cleaners that can damage the flooring.
Can I install French Oak laminate flooring in kitchens and bathrooms?
While French Oak laminate flooring can be installed in kitchens and bathrooms, it’s crucial to take extra precautions to protect the flooring from moisture. Ensure the subfloor is dry, and consider applying a moisture barrier or sealant to the edges and around fixtures.
How do I repair scratches or damage to my French Oak laminate flooring?
To repair minor scratches or damage, use a laminate floor repair kit or touch-up pen to match the color of the flooring. For more extensive damage, you may need to replace the affected planks or consult a professional for assistance.
What is the recommended underlayment for French Oak laminate flooring?
The recommended underlayment for French Oak laminate flooring is typically a foam or cement-based underlayment that provides a smooth, even surface and helps to reduce noise and moisture transfer.
Can I install French Oak laminate flooring over a radiant heating system?
Yes, you can install French Oak laminate flooring over a radiant heating system, but it’s essential to follow the manufacturer’s guidelines and take necessary precautions to ensure the flooring is compatible with the heating system.
How do I ensure a successful installation of French Oak laminate flooring?
To ensure a successful installation, follow the manufacturer’s instructions, prepare the subfloor properly, and use the recommended underlayment and installation techniques. It’s also crucial to acclimate the flooring to the room’s temperature and humidity before installation.
Read also : Engineered French Oak – Timeless Beauty Meets Modern Innovation