Discovering the Beauty and Durability of 1 2 Engineered Hardwood
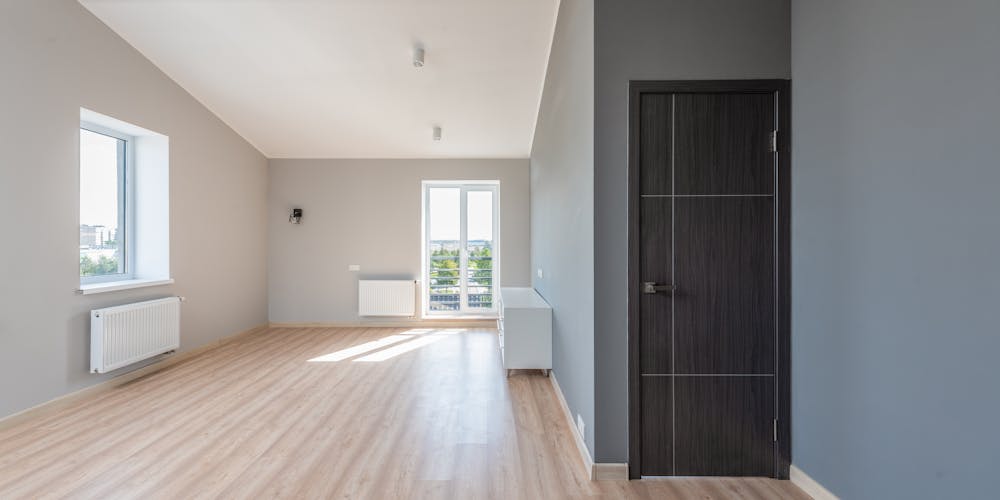
When considering flooring options that offer both aesthetic appeal and practical benefits, 1 2 engineered hardwood flooring stands out as a compelling choice, blending the timeless elegance of solid wood with enhanced stability and versatility.
Understanding the fundamental nature of 1 2 engineered hardwood flooring is the first step in appreciating its value. Unlike its solid counterpart, engineered hardwood is a multi-layered product meticulously crafted to provide superior performance and adaptability in various environments.
Definition and Composition
At its core, 1 2 engineered hardwood flooring is precisely what the name suggests: a flooring material constructed from multiple layers of wood fused together under high pressure and heat. The term “1 2” typically refers to the thickness of the wear layer, the visible top layer of genuine hardwood, which is often just 1-2 millimeters thick in some cases, though variations exist in the market. Beneath this wear layer lies a core made of multiple cross-ply layers of plywood, high-density fiberboard (HDF), or a combination of wood and other materials. This layered structure is the key to engineered hardwood’s exceptional stability and resistance to moisture fluctuations.
The composition is a marvel of modern woodworking technology. Imagine a carefully constructed sandwich, where the top slice of bread is the beautiful, naturally-grained hardwood veneer – this is the part you see and walk on. The filling of the sandwich is the robust, multi-layered core, designed to provide strength and prevent warping or cupping. The bottom slice is often a balancing layer, ensuring the entire plank remains flat and stable. This intricate construction not only utilizes wood resources more efficiently but also creates a product that can withstand conditions that would challenge solid hardwood. The thickness of the wear layer, while varying, directly impacts the number of times the floor can be refinished, which is a crucial consideration for longevity. A thicker wear layer means more opportunities to sand and restore the floor’s original beauty, extending its lifespan significantly.
The beauty of this composition lies in its inherent stability. Because the layers are laid in opposing directions, the natural expansion and contraction of the wood due to changes in humidity are significantly minimized. This makes engineered hardwood a far more suitable option for areas where solid hardwood might be problematic, such as basements or over concrete slabs. The engineering behind it is a testament to innovation, allowing us to enjoy the warmth and character of real wood in a wider range of applications, making it a truly versatile and practical flooring solution for modern homes and commercial spaces alike.
Benefits of Choosing Engineered Hardwood
The advantages of opting for engineered hardwood are numerous and compelling, making it a popular choice for homeowners and designers alike. One of the primary benefits is its superior stability compared to solid hardwood. This inherent resistance to moisture and temperature fluctuations means engineered flooring is less prone to warping, cupping, or gapping, making it suitable for installation in areas where solid wood might be ill-advised, such as basements or over concrete subfloors. This expanded applicability opens up a world of possibilities for incorporating the timeless beauty of wood into spaces that were previously off-limits.
Another significant benefit is the ease of installation. Engineered hardwood flooring can often be installed using various methods, including floating, glue-down, or nail-down, offering flexibility depending on the subfloor and personal preference. Floating installations, in particular, are often quicker and less labor-intensive, making them an attractive option for DIY enthusiasts or projects with tighter timelines. Furthermore, engineered hardwood is often more environmentally friendly than solid hardwood. Because the wear layer is a relatively thin veneer of exotic or expensive wood, more flooring can be produced from a single tree compared to using the entire plank as solid wood. This efficient use of resources contributes to sustainable forestry practices and reduces the overall environmental impact of your flooring choice.
Finally, the cost-effectiveness of engineered hardwood is a significant draw for many. While the price can vary depending on the thickness of the wear layer, the species of wood used, and the manufacturing process, engineered hardwood is often more affordable than comparable solid hardwood flooring. This allows homeowners to achieve the look and feel of solid wood at a more accessible price point, making it a practical and budget-friendly option without compromising on quality or aesthetics. The combination of stability, ease of installation, environmental considerations, and cost makes a compelling case for choosing engineered hardwood for your next flooring project.
Differences Between Solid and Engineered Hardwood
While both solid and engineered hardwood offer the aesthetic appeal of real wood, their fundamental differences lie in their construction, stability, and suitability for various applications. Solid hardwood, as the name suggests, is a single piece of timber milled from a log. This monolithic structure makes it susceptible to expansion and contraction with changes in humidity, which can lead to issues like gapping, cupping, and warping, particularly in moisture-prone areas or throughout significant seasonal changes. It is typically installed by nailing or stapling it directly to a wooden subfloor.
Engineered hardwood, on the other hand, is a multi-layered product with a real wood veneer on top and a stable core underneath. This layered construction provides significantly greater stability and resistance to moisture fluctuations. The cross-ply layers in the core counteract the natural movement of the wood, making engineered hardwood a more suitable option for installation over concrete slabs, in basements, or in areas with fluctuating humidity levels. While solid hardwood can be sanded and refinished multiple times throughout its lifespan, the ability to refinish engineered hardwood depends on the thickness of its wear layer. A thicker wear layer allows for more refinishing opportunities, extending the floor’s longevity.
The installation methods also vary. Solid hardwood is primarily installed by nailing or stapling. Engineered hardwood offers more flexibility with options for floating, glue-down, or nail-down installations, allowing for adaptability to different subfloor types and project requirements. In essence, solid hardwood is the traditional, classic choice, offering the potential for decades of refinishing but requiring stable environmental conditions. Engineered hardwood is the modern, practical alternative, offering enhanced stability and versatility in installation, making it suitable for a wider range of applications while still providing the beauty and warmth of real wood. Understanding these key differences is crucial when deciding which type of hardwood flooring is best suited for your specific needs and the environment of your space.
Key Features of 1 2 Engineered Hardwood Flooring

Delving deeper into the specifics of 1 2 engineered hardwood flooring reveals the design elements and construction details that contribute to its performance and appeal. Understanding these features is essential for making an informed decision about whether this type of flooring is the right fit for your project.
Thickness and Layers Explained
The thickness of 1 2 engineered hardwood flooring is a crucial characteristic that impacts its durability, stability, and the potential for refinishing. As the name suggests, the overall thickness of the plank can vary, but the key elements are the thickness of the wear layer and the composition of the core. The wear layer, the top layer of genuine hardwood, is the surface you see and walk on. Its thickness is paramount because it determines how many times the floor can be sanded and refinished over its lifespan. While the “1 2” in the name can sometimes refer to a very thin wear layer (1-2 mm), it’s important to note that engineered hardwood is available with significantly thicker wear layers, ranging from 2mm to 6mm or even more. A thicker wear layer translates to a longer-lasting floor, as each refinishing removes a small amount of material. Therefore, for high-traffic areas or those where long-term durability and the ability to refresh the floor’s appearance are priorities, opting for engineered hardwood with a substantial wear layer is advisable.
Beneath the wear layer lies the core, the structural heart of the engineered plank. This core is typically composed of multiple layers of plywood, high-density fiberboard (HDF), or a combination of materials. The layers are typically arranged in a cross-ply pattern, meaning the grain of each layer runs perpendicular to the layer above and below it. This cross-grain construction is the secret to engineered hardwood’s remarkable stability. By counteracting the natural tendency of wood to expand and contract with changes in humidity, the core prevents warping, cupping, and gapping, making engineered flooring far more stable than solid hardwood, especially in environments with fluctuating moisture levels. The thickness and density of the core also contribute to the overall strength and stability of the plank, making it resistant to impact and indentations.
The total thickness of the engineered hardwood plank, which typically ranges from 3/8 inch to 3/4 inch, is a combination of the wear layer and the core. The overall thickness affects the feel of the floor underfoot and can also influence the installation method and compatibility with existing flooring or doorways. While the “1 2” might initially suggest a very thin overall profile, it’s crucial to understand that it often refers more specifically to the wear layer thickness in certain product lines. A thorough understanding of both the wear layer thickness and the core composition is essential when evaluating and selecting engineered hardwood flooring to ensure it meets the specific needs and expectations for your space, balancing aesthetics with performance and longevity.
Surface Veneer Options
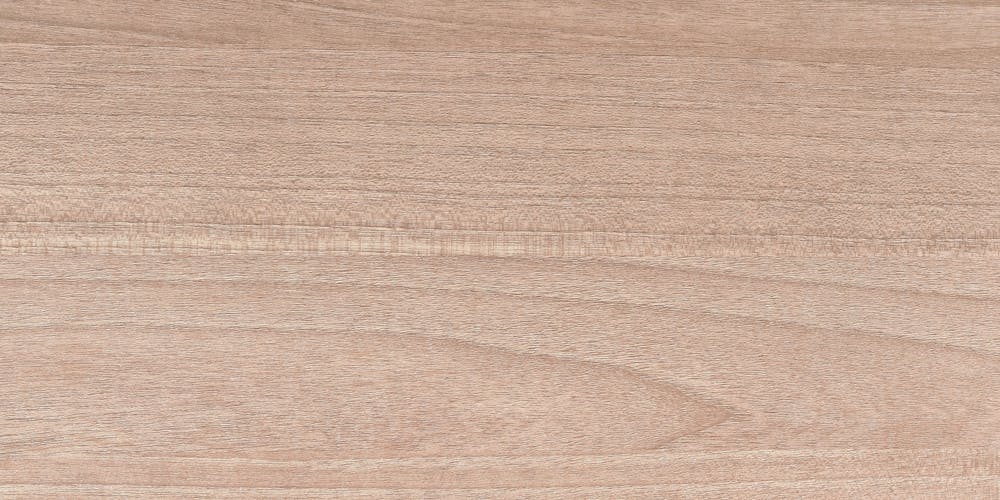
The surface veneer of 1 2 engineered hardwood flooring is arguably its most visually impactful feature, as it is the real wood layer that provides the aesthetic appeal and character of the floor. This veneer is available in a vast array of wood species, offering an unparalleled selection of colors, grain patterns, and textures to suit virtually any design style and personal preference. From the classic warmth of oak and maple to the exotic beauty of Brazilian cherry or walnut, the possibilities are nearly endless. The choice of wood species for the veneer not only dictates the visual appearance but also influences the hardness and durability of the surface. Harder wood species are more resistant to scratches and dents, making them a better choice for high-traffic areas or homes with pets and active lifestyles.
Beyond the wood species, the surface veneer can be finished in numerous ways to further enhance its appearance and provide protection. Finishes can range from natural clear coats that highlight the inherent beauty of the wood to stains that alter the color and create a specific look. The sheen of the finish also plays a significant role in the overall aesthetic, with options ranging from matte and satin to semi-gloss and high-gloss. Matte finishes offer a more natural, understated look and are better at hiding minor imperfections, while higher gloss finishes create a more formal, reflective surface that can make a room feel brighter. The application of protective coatings, such as aluminum oxide or polyurethane, is also common, providing enhanced scratch resistance and durability to the wear layer, extending its lifespan and maintaining its beauty over time.
The cut of the veneer also influences the grain pattern and overall appearance. Different cutting methods, such as plain-sawn, quarter-sawn, and rift-sawn, produce distinct grain patterns. Plain-sawn is the most common and produces the familiar cathedral pattern. Quarter-sawn and rift-sawn cuts result in straighter, more linear grain patterns and are often more stable, although they can be more expensive. The ability to choose from such a wide variety of wood species, finishes, and cuts means that 1 2 engineered hardwood flooring offers a level of customization that allows homeowners to achieve a truly unique and personalized look for their space, ensuring that the floor is not only beautiful but also perfectly complements the overall design vision.
Stability and Durability Factors
The stability and durability of 1 2 engineered hardwood flooring are key performance indicators that set it apart from solid hardwood, particularly in challenging environments. The multi-layered construction, with its cross-ply core, is the primary factor contributing to its exceptional stability. This engineered structure significantly minimizes the natural expansion and contraction of wood in response to fluctuations in humidity and temperature. Unlike solid hardwood, which can swell and shrink considerably, leading to issues like cupping, warping, and gapping, engineered hardwood remains far more dimensionally stable. This makes it an ideal choice for installation below grade, such as in basements, or over concrete slabs, where moisture levels can be higher and more variable. The stability also contributes to a more consistent and predictable installation process, reducing the likelihood of post-installation problems related to wood movement.
The durability of 1 2 engineered hardwood flooring is influenced by several factors, including the species and thickness of the wear layer, the quality of the core material, and the type of finish applied. Harder wood species, as measured by the Janka hardness scale, are more resistant to scratches, dents, and wear, making them a more durable choice for high-traffic areas. The thickness of the wear layer is also crucial for durability, as it determines the number of times the floor can be refinished. A thicker wear layer allows for multiple sandings and refinishings over the floor’s lifespan, effectively extending its durability and restoring its original beauty. The quality and density of the core material also play a role in the overall durability and resistance to impact.
Furthermore, the factory-applied finishes on engineered hardwood are often incredibly durable and resistant to scratches, abrasions, and stains. Many manufacturers utilize advanced finishing techniques and protective coatings, such as aluminum oxide, which is significantly harder than traditional polyurethane finishes. These durable finishes provide a strong protective barrier for the wear layer, helping to preserve its appearance and integrity under everyday use. While no wood floor is completely impervious to damage, the combination of the stable engineered structure, the choice of durable wood species, and robust finishes makes 1 2 engineered hardwood flooring a highly durable and long-lasting flooring option that can withstand the rigors of daily life while maintaining its aesthetic appeal for many years.
Installation Methods for 1-2 Engineered Hardwood Flooring
One of the significant advantages of 1 2 engineered hardwood flooring is the variety of installation methods available, offering flexibility to suit different subfloor types, skill levels, and project requirements. Understanding these methods is crucial for a successful and long-lasting installation.
Engineered hardwood can be installed using three primary methods: floating, glue-down, and nail-down. The choice of method often depends on the type of subfloor, the environmental conditions of the space, and the desired aesthetic and feel of the finished floor. Each method has its own advantages and considerations, and selecting the appropriate one is essential for a stable and durable installation.
Floating Installation Technique
The floating installation method is a popular and often preferred technique for 1 2 engineered hardwood flooring due to its relative ease and speed. In a floating installation, the engineered wood planks are not directly attached to the subfloor. Instead, they are typically joined together using a tongue-and-groove system with adhesive applied to the joints or with a click-lock mechanism that allows the planks to snap together. The entire floor then “floats” over a layer of underlayment, which provides cushioning, sound deadening, and moisture protection. This method is particularly suitable for installation over concrete slabs, existing flooring (like tile or linoleum, provided it is flat and stable), or plywood subfloors. It is also a great option for DIYers as it requires fewer specialized tools and less adhesive compared to glue-down installations.
One of the key benefits of a floating installation is its ability to accommodate minor movements in the subfloor. Since the floor is not rigidly attached, it can expand and contract slightly as a single unit, which can be advantageous in areas with fluctuating humidity. The underlayment used in a floating installation also plays a crucial role. It provides a cushion underfoot, making the floor more comfortable to walk on and reducing noise transmission between floors. Different types of underlayment are available, with varying levels of moisture protection, sound insulation, and thickness. Choosing the right underlayment is essential for the success and longevity of a floating floor installation.
However, there are also some considerations with floating installations. While generally stable, a floating floor can feel slightly more “hollow” or less substantial underfoot compared to a glued or nailed down floor. It’s also crucial to ensure the subfloor is clean, dry, and level before beginning a floating installation, as any imperfections in the subfloor can telegraph through the floating floor over time. Expansion gaps around the perimeter of the room are also critical to allow the floating floor to expand and contract without buckling. Despite these considerations, the speed, ease, and versatility of the floating installation method make it a highly attractive option for many 1 2 engineered hardwood flooring projects.
Glue-down Installation Technique
The glue-down installation method involves adhering the 1 2 engineered hardwood flooring planks directly to the subfloor using a specialized adhesive. This method provides a very solid and stable feel underfoot, similar to a traditional solid hardwood floor. It is particularly well-suited for installation over concrete slabs, where nailing is not an option, and can also be used over plywood subfloors. Glue-down installations are often preferred in commercial settings or high-traffic areas where maximum stability and a rigid feel are desired. The adhesive not only secures the planks but can also provide a moisture barrier, offering an additional layer of protection against moisture from the subfloor.
The process typically involves spreading the adhesive evenly over a section of the subfloor using a trowel with the recommended notch size as specified by the adhesive manufacturer. The engineered wood planks are then laid into the wet adhesive, ensuring good contact and alignment. It is crucial to use the correct type of adhesive recommended for engineered hardwood and the specific subfloor material, as using the wrong adhesive can lead to installation failure. The adhesive provides a strong bond, preventing the planks from shifting or moving over time, which contributes to the longevity and stability of the floor.
While glue-down installations offer excellent stability and a solid feel, they are generally more labor-intensive and require more skill than floating installations. The adhesive application needs to be precise, and cleanup of excess adhesive can be challenging. It is also important to ensure the subfloor is completely clean, dry, and free of any contaminants before applying the adhesive, as this can compromise the bond. The curing time of the adhesive also needs to be considered before the floor can be walked on or furniture placed on it. Despite the increased complexity, the glue-down method provides a highly durable and stable installation for 1 2 engineered hardwood flooring, making it a preferred choice for projects where a solid, permanent feel is paramount.
Nail-down Installation Technique
The nail-down installation method is a traditional technique commonly used for installing 1 2 engineered hardwood flooring over a wooden subfloor, typically plywood or oriented strand board (OSB). In this method, the engineered wood planks are fastened to the subfloor using pneumatic nailers or staplers. The fasteners are typically driven through the tongue of the plank at an angle (blind nailing), concealing the fasteners once the next row of planks is installed. This method provides a very secure and stable installation, similar to that of solid hardwood. It is a tried-and-true method that has been used for generations and is favored by many professional installers.
Nail-down installations create a rigid floor that feels very solid underfoot. This method is particularly suitable for upper levels of a home or areas where a traditional hardwood feel is desired. It also allows for easy removal of individual planks if necessary for repairs or replacements, which can be more challenging with glue-down installations. The use of pneumatic nailers or staplers significantly speeds up the installation process compared to manual nailing, making it an efficient method for larger areas. It is important to use the correct type and length of fasteners as recommended by the flooring manufacturer to ensure a secure and long-lasting installation.
However, the nail-down method is only suitable for wooden subfloors and is not an option for concrete slabs. It also requires specialized tools, such as a pneumatic nailer or stapler, which may require renting or purchasing if you are not a professional installer. Proper nailing technique is crucial to avoid damaging the planks or the subfloor. While generally less sensitive to minor subfloor imperfections than floating installations, the subfloor still needs to be clean, dry, and reasonably level for a successful nail-down installation. Despite these considerations, the nail-down method remains a popular and effective way to install 1 2 engineered hardwood flooring, providing a durable and stable floor with a classic hardwood feel.
Maintenance and Care for 1-2 Engineered Hardwood Flooring
Proper maintenance and care are essential to ensure the longevity and preserve the beauty of your 1 2 engineered hardwood flooring. While engineered hardwood is generally more stable and durable than solid hardwood, it still requires attention to keep it looking its best for years to come. Implementing a regular cleaning routine and taking preventative measures can significantly extend the lifespan of your floor and maintain its aesthetic appeal.
Understanding the specific requirements for caring for engineered hardwood is important, as improper cleaning methods or products can damage the finish and the wear layer. With the right approach, maintaining the beauty and integrity of your 1 2 engineered hardwood flooring is a manageable task that will pay off in the long run by preserving your investment and keeping your home looking its best.
Cleaning Recommendations
Maintaining the cleanliness of your 1 2 engineered hardwood flooring is a fundamental aspect of its care. Regular cleaning not only keeps the floor looking good but also removes abrasive particles like dirt, dust, and grit that can scratch and wear down the finish over time. The most basic and important step in cleaning is frequent sweeping, dusting, or vacuuming. Using a soft bristle broom or a vacuum cleaner with a hard floor attachment is recommended to avoid scratching the surface. Avoid using vacuum cleaners with beater bars, as these can damage the wear layer and finish. Regular removal of surface debris is the first line of defense against wear and tear.
For more thorough cleaning, occasional damp mopping is acceptable, but it is crucial to use a well-wrung mop that is only slightly damp, not wet. Excessive moisture is the enemy of any wood flooring, including engineered hardwood, and can lead to swelling, warping, or damage to the core layers. Use a cleaning solution specifically designed for engineered hardwood floors. Avoid using harsh chemicals, abrasive cleaners, oil-based soaps, or excessive amounts of water. Many manufacturers of engineered hardwood flooring also offer their own recommended cleaning products, which are formulated to be safe and effective for their specific finishes. Always test a new cleaning product in an inconspicuous area first to ensure it does not damage the finish.
Spot cleaning is also important for addressing spills and stains promptly. Wipe up spills immediately with a clean, dry cloth to prevent them from soaking into the wood or finish. For stubborn stains, consult the flooring manufacturer’s recommendations or use a cleaning product specifically designed for the type of stain. Avoid using harsh scrubbing pads or abrasive materials, as these can scratch the finish. By adhering to a regular cleaning schedule and using appropriate methods and products, you can effectively remove dirt and debris, maintain the cleanliness of your 1 2 engineered hardwood flooring, and protect its finish from premature wear, keeping it looking beautiful for years to come.
Refinishing Possibilities
The ability to refinish 1 2 engineered hardwood flooring is a significant advantage that contributes to its longevity, although the extent of refinishing depends heavily on the thickness of the wear layer. Refinishing involves sanding down the top layer of wood to remove scratches, dents, and wear marks, and then applying a new finish to restore the floor’s original appearance. For engineered hardwood, this is only possible if the wear layer is thick enough to withstand the sanding process. As mentioned earlier, the “1 2” in the name can sometimes indicate a very thin wear layer (1-2 mm), which may not be thick enough for even one full refinishing. However, engineered hardwood is available with wear layers ranging from 2mm to 6mm or more.
A thicker wear layer provides more “sandable” material, allowing for multiple refinishings over the lifespan of the floor. Engineered hardwood with a wear layer of 3mm or more can typically be refinished at least once, while those with thicker wear layers (4mm to 6mm+) can often be refinished multiple times, similar to solid hardwood. The number of times a floor can be refinished depends on the initial thickness of the wear layer and the amount of material removed during each sanding. Professional refinishers are experienced in determining whether an engineered hardwood floor has sufficient wear layer thickness to be refinished and can advise on the best approach.
Refinishing is a more intensive process than regular cleaning and is typically done to address significant wear, deep scratches, or to change the color or sheen of the floor. While it can breathe new life into an old floor, it is a complex task that often requires specialized equipment and expertise. If your 1 2 engineered hardwood flooring has a thick enough wear layer and is showing signs of significant wear or damage, refinishing is a viable option to restore its beauty and extend its lifespan. However, if the wear layer is very thin, refinishing may not be possible, and replacement might be the only option for restoring the floor’s appearance. Consulting with a flooring professional is the best way to determine the refinishing possibilities for your specific engineered hardwood floor.
Preventative Measures to Extend Lifespan
Taking proactive steps to prevent damage is just as important as regular cleaning and maintenance for extending the lifespan of your 1 2 engineered hardwood flooring. Simple preventative measures can significantly reduce wear and tear and keep your floor looking its best for many years. One of the most effective measures is to use doormats at all entrances to your home. These mats trap dirt, grit, and moisture from shoes, preventing them from being tracked onto your hardwood floor, where they can act like sandpaper and scratch the finish. Regularly cleaning or shaking out these mats will ensure they remain effective.
Using furniture pads or protectors on the legs of all furniture is another crucial preventative measure. Dragging furniture across the floor without protection can cause significant scratches and dents, particularly on softer wood species or thinner wear layers. Felt pads, rubber cups, or other types of furniture protectors can prevent this damage. Regularly check these pads to ensure they are clean and in good condition. Rearranging furniture periodically can also help to distribute wear patterns evenly across the floor, preventing excessive wear in specific areas.
Controlling humidity levels in your home is also important for the stability and longevity of your engineered hardwood flooring. While engineered hardwood is more stable than solid hardwood, extreme fluctuations in humidity can still cause some movement or stress on the planks. Maintaining a consistent relative humidity level (typically between 35% and 55%) using humidifiers or dehumidifiers can help to minimize expansion and contraction. Protecting your floor from direct sunlight, which can cause fading or discoloration over time, is also advisable. Using curtains, blinds, or UV-protective window films can help to reduce the impact of direct sunlight. By implementing these simple preventative measures, you can significantly reduce the risk of damage, minimize wear and tear, and ensure that your 1 2 engineered hardwood flooring maintains its beauty and integrity for a longer period, maximizing your investment in your home.
Choosing the Right 1-2 Engineered Hardwood Flooring for Your Space
Selecting the perfect 1 2 engineered hardwood flooring for your home or commercial space involves considering several factors beyond just the aesthetic appeal. Making an informed decision requires evaluating the specific needs of your space, your lifestyle, and your budget to ensure you choose a floor that not only looks beautiful but also performs well and lasts for many years.
Thinking about the intended use of the space, the amount of traffic it will receive, and the environmental conditions are all crucial elements in the selection process. By carefully considering these factors, you can narrow down the vast array of options and find the engineered hardwood flooring that is the ideal fit for your unique requirements.
Factors to Consider When Selecting Flooring
When embarking on the process of selecting 1 2 engineered hardwood flooring, several key factors should guide your decision to ensure you choose a product that is both aesthetically pleasing and functionally appropriate for your space. The first consideration should be the intended use of the room and the amount of traffic it will receive. High-traffic areas, such as hallways and living rooms, will require a more durable floor with a harder wood species for the wear layer and a robust finish to resist scratches and wear. Conversely, lower-traffic areas like bedrooms may allow for a wider selection of wood species and finishes.
The environmental conditions of the space are also critical. If you are installing the flooring in a basement or an area prone to moisture fluctuations, the stability of the engineered core is paramount. Ensure the engineered hardwood you choose is specifically rated for installation in such environments and consider using a moisture barrier during installation. The type of subfloor you have will also influence the appropriate installation method (floating, glue-down, or nail-down), which in turn can influence the type of engineered hardwood you can choose. Understanding your subfloor is essential for a successful installation.
Finally, consider your lifestyle and maintenance preferences. Do you have pets or children? These factors can increase the likelihood of scratches and spills, suggesting the need for a more durable wood species and a highly protective finish. Are you willing to commit to regular cleaning and maintenance? Some finishes and wood species may require more diligent care than others. Thinking about how you live in your home and your willingness to maintain the floor will help you select a product that is both beautiful and practical for your everyday life, ensuring you are satisfied with your 1 2 engineered hardwood flooring investment for years to come.
Popular Styles and Finishes
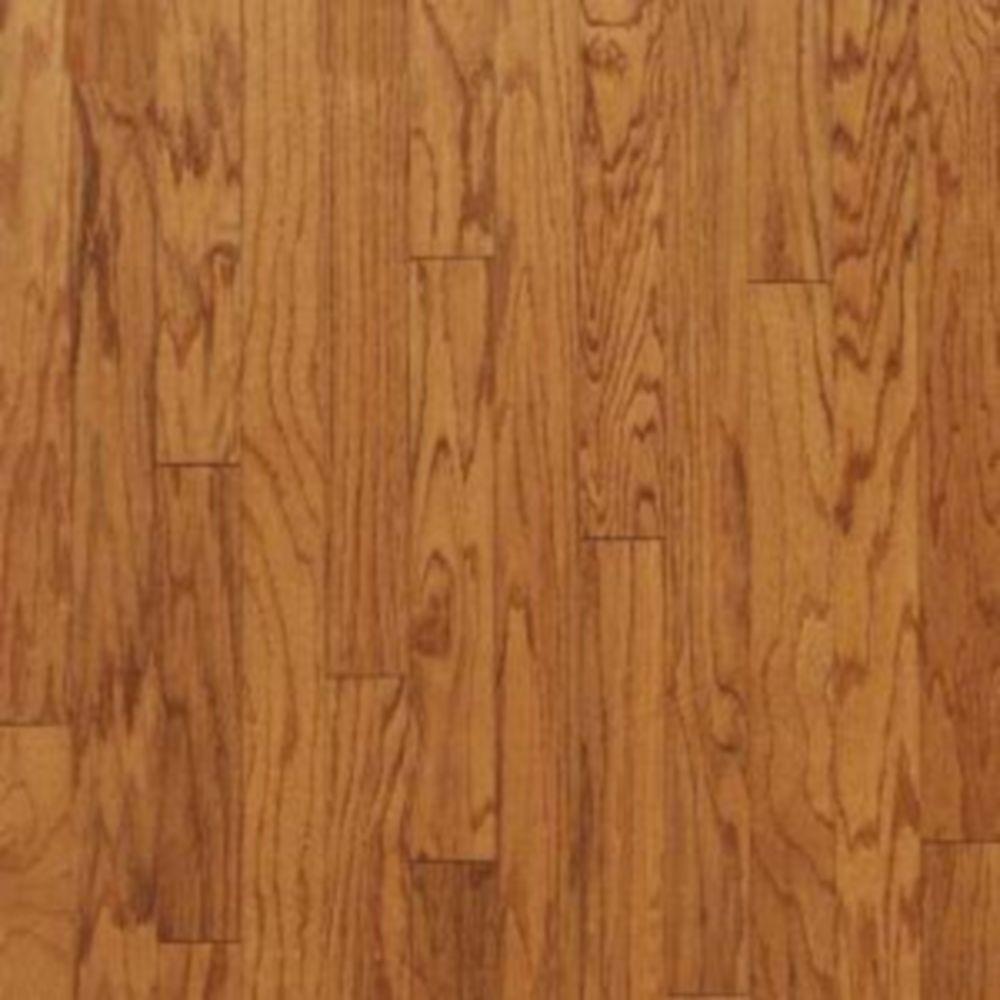
The versatility of 1 2 engineered hardwood flooring is evident in the wide range of popular styles and finishes available, allowing homeowners to achieve virtually any aesthetic they desire. When it comes to style, the width of the planks is a significant factor that influences the overall look of the floor. Wide plank engineered hardwood has become increasingly popular, offering a more contemporary and spacious feel to a room. Narrower planks, on the other hand, can create a more traditional or classic look. The length of the planks also contributes to the style, with longer planks often creating a more seamless and expansive appearance.
The cut of the veneer, as discussed earlier, also plays a role in the style. Plain-sawn veneers, with their characteristic cathedral grain patterns, are a classic choice. Quarter-sawn and rift-sawn veneers offer straighter, more linear grain patterns that can lend a more modern or formal feel. The presence or absence of bevels (a slight angle on the edges of the planks) also affects the style. Micro-beveled edges create subtle definition between planks, while heavily beveled edges create a more rustic or distressed look. Floors with no bevels offer a smooth, seamless appearance.
Finishes are where the aesthetic possibilities truly open up. Natural finishes highlight the inherent color and grain of the wood. Stains can dramatically change the color of the wood, ranging from light, airy tones to deep, rich hues. Distressed or hand-scraped finishes create an aged or rustic look, adding character and concealing minor dents and scratches. The sheen of the finish also impacts the style, with matte finishes offering a subtle, natural look and higher gloss finishes creating a more formal and reflective surface. By carefully considering the plank width, length, veneer cut, and the vast array of finish options, you can select 1 2 engineered hardwood flooring that perfectly complements your interior design style and creates the desired ambiance in your space.
Cost Analysis and Budgeting Tips
Understanding the cost implications of 1 2 engineered hardwood flooring is essential for effective budgeting and making a financially sound decision. The cost of engineered hardwood flooring can vary significantly based on several factors, including the species of wood used for the wear layer, the thickness of the wear layer, the quality of the core material, the complexity of the manufacturing process, and the brand. Exotic or rare wood species tend to be more expensive than common domestic species. Engineered hardwood with a thicker wear layer will generally cost more than those with thinner wear layers, as they offer greater durability and refinishing potential.
- Factors influencing the cost of 1 2 engineered hardwood flooring:
- Wood Species (Exotic vs. Domestic)
- Wear Layer Thickness
- Core Material Quality
- Manufacturing Process and Brand Reputation
- Finish Type and Durability
- Installation Method (DIY vs. Professional)
- Underlayment and Adhesive Costs
- Subfloor Preparation
Installation costs are another significant component of the overall budget. The cost of installation will depend on the chosen method (floating, glue-down, or nail-down), the complexity of the space, and whether you opt for professional installation or a DIY approach. Professional installation will generally be more expensive but offers the assurance of proper technique and a potentially faster completion time. If you plan to install the flooring yourself, factor in the cost of renting or purchasing necessary tools and materials like underlayment and adhesive.
To effectively budget for your 1 2 engineered hardwood flooring project, it’s advisable to get quotes from multiple suppliers and installers. Compare not only the per-square-foot cost of the flooring itself but also the estimated installation costs and any additional materials required. Don’t forget to factor in the cost of subfloor preparation, which may be necessary to ensure a smooth and stable base for the new flooring. While it can be tempting to choose the cheapest option, remember that quality and durability are important for long-term satisfaction. Balancing cost with the features and quality that meet your needs is key to making a wise investment in your 1 2 engineered hardwood flooring.
Video
Video source from youtube
Conclusion
In conclusion, 1 2 engineered hardwood flooring presents a compelling and versatile flooring solution, offering the timeless beauty of real wood combined with enhanced stability and adaptability. Throughout this exploration, we’ve delved into its definition and composition, highlighting the crucial role of the layered structure in providing resistance to moisture fluctuations. We’ve examined the numerous benefits, from increased stability and ease of installation to potential environmental advantages and cost-effectiveness, clearly differentiating it from solid hardwood. The key features, including the impact of wear layer thickness and core composition on durability and refinishing possibilities, along with the vast array of surface veneer options and their influence on style, underscore the flexibility and customization offered by engineered hardwood. We’ve also detailed the various installation methods – floating, glue-down, and nail-down – providing insights into their suitability for different subfloors and project requirements. Finally, we’ve emphasized the importance of proper maintenance and care through detailed cleaning recommendations, an overview of refinishing possibilities based on wear layer thickness, and essential preventative measures to extend the lifespan of your investment. Choosing the right 1 2 engineered hardwood flooring involves carefully considering factors such as intended use, environmental conditions, and budget, alongside exploring the diverse styles and finishes available to achieve the desired aesthetic. Ultimately, understanding the advantages, features, and care requirements empowers potential buyers to make an informed decision and enjoy the enduring beauty and practical benefits of 1 2 engineered hardwood flooring in their space.
Read also : How to Install 1 2 Engineered Flooring