Elevate your DIY skills with 16 captivating 1 16 wood craft ideas. From home decor to practical solutions, this list has something for everyone.
Exploring 1 16 wood crafting opens a world of creativity. This scale, where one inch equals sixteen inches in real life, is perfect for mini woodworking fans. It’s great for both new and experienced crafters, offering a sense of accomplishment.
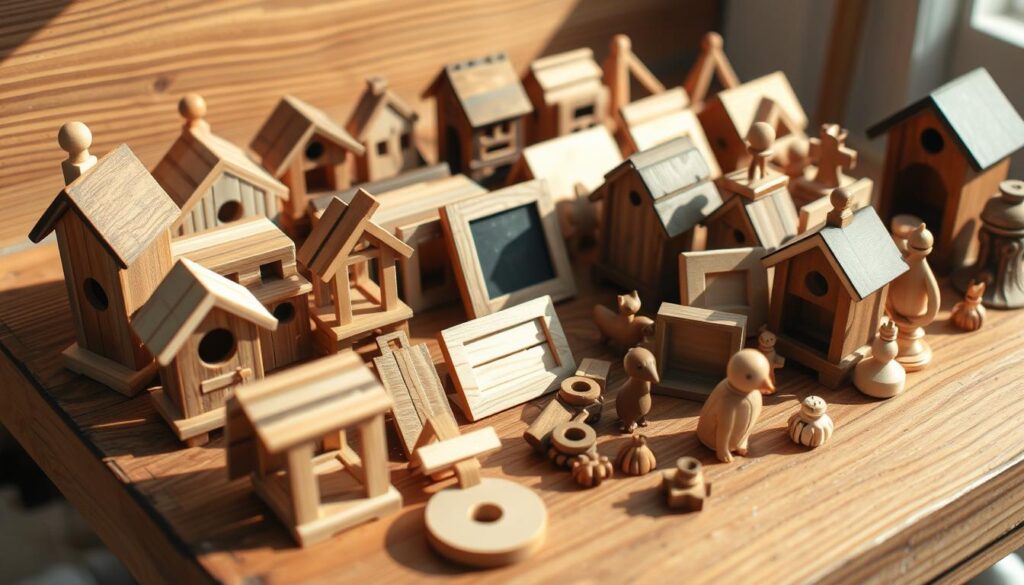
DIY miniatures at this scale are detailed yet easy to make. You can create dollhouse furniture or useful storage. These tiny projects turn simple materials into amazing treasures. They also improve your crafting skills and bring joy to all who see them.
In this guide, we’ll look at 16 unique and useful ideas for 1:16 scale projects. You’ll see how everyday materials can become tiny works of art. These projects are both beautiful and useful, and you can make them at home.
Key Takeaways
- 1:16 scale offers the ideal balance between detail and workability for miniature crafts
- Basic woodworking skills can be applied to create charming scale models
- Miniature woodworking projects range from dollhouse furniture to seasonal decorations
- Most 1 16 wood crafts require minimal materials and basic tools
- DIY miniatures can serve both decorative and practical purposes in your home
- Scale wood projects help develop precision and attention to detail
Understanding 1 16 Wood Scale in Miniature Crafting
Miniature crafting lets you make detailed copies of real things. The 1:16 scale is a favorite among fans. It means one inch in your model is like sixteen inches in real life. This makes tiny creations look just right.
What Makes 1:16 Scale Special
The 1:16 scale is great for both detail and ease of work. It’s a dollhouse scale that’s big enough for small details but small enough to display. Keeping the scale the same is key to making miniatures look real.
Many like this scale because it lets you add lots of detail without needing special glasses. It’s perfect for making dollhouses, model farms, and old cars that look real.
Common Materials and Supplies
For 1:16 scale modeling, you need the right miniature wood supplies. Basswood is a top pick because it’s easy to work with. Balsa wood is good for light parts, and small hardwood pieces make things stronger.
Special adhesives are key for sticking tiny pieces together. Use quick-setting wood glue that doesn’t make things thick. You’ll also need tiny sandpaper, stains, and sealants to make things look real.
Basic Tools for Working with Miniature Wood
When working with wood miniature tools, precision is everything. You’ll need:
- Sharp X-acto knives with different blades
- Miniature hand saws for clean cuts
- Tiny clamps and tweezers to hold pieces
- Fine-grit sandpaper (220 grit and higher)
- Precision rulers marked in 1/16-inch increments
Good tools make a big difference. Special wood miniature tools like micro chisels and pin vises are very helpful as projects get harder.
Essential Techniques for Working with Miniature Wood
Working with tiny wood pieces needs precision and patience. To start, learn the right cutting methods. Use a sharp X-Acto knife or a miniature saw with fine teeth for clean cuts on balsa or basswood. Place your wood on a self-healing mat and make light passes, not one big cut.
Video source from Youtube
Small-scale joinery is tricky because of the tiny pieces. Use wood glue with a toothpick for simple butt joints. For stronger joints, try lap or finger joints that offer more surface area for glue.
Micro wood cutting needs steady hands and good lighting. Use a magnifying lamp to see details well. When making fine cuts, keep your wrist or forearm on the work surface to avoid shaking.
- Use fine-grade sandpaper (220 grit or higher) wrapped around a small block
- Apply stains with small brushes or cotton swabs cut in half
- Test finishes on scrap pieces before applying to your project
Fine wood finishing makes miniatures look real. Dilute wood stains to 50% strength for better control. Apply thin layers of matte clear coat between color layers for depth without hiding details.
| Technique | Application | Recommended Tools |
|---|---|---|
| Micro Sanding | Smoothing edges and surfaces | Emery boards, nail files |
| Pin Nailing | Temporary holding while glue dries | Sewing pins, tweezers |
| Edge Burnishing | Creating finished edges | Rounded metal tool, burnisher |
Elegant Dollhouse Furniture Projects Using 1 16 Wood
Making miniature wood furniture at 1:16 scale turns small areas into cozy homes. This size is great for those who love dollhouse furniture DIY. With some woodworking skills and patience, you can make beautiful pieces that show off your talent.
Miniature Living Room Set
Starting a living room collection means picking the right materials. Basswood and balsa are best for their fine grain and ease of use. For sofas and chairs, use thin wood for frames and add fabric for a cozy look. Coffee tables look better with edges smoothed out by sandpaper.
- Sofa frame: 1″ x 0.5″ basswood
- Armchair: 0.5″ cube blocks
- Coffee table: 0.75″ x 0.5″ thin plywood
Tiny Kitchen Cabinets and Tables
Kitchen pieces need precise cutting for a realistic look. Cabinet doors can have working hinges from thin wire. Countertops can be made from painted basswood or tiny ceramic tiles from polymer clay. Kitchen tables are enhanced with turned legs from dowel rods, sanded to a taper.
| Furniture Piece | Recommended Wood | Difficulty Level |
|---|---|---|
| Kitchen Cabinet | Basswood | Medium |
| Kitchen Table | Maple or Birch | Medium-High |
| Chairs | Balsa | High |
Dollhouse Bedroom Furnishings
Bedroom items highlight the fine details of 1:16 scale furniture. Bed frames can be made from popsicle sticks, with headboards detailed by wood burning tools. Dressers have tiny drawers from matchboxes covered in wood veneer. Nightstands are enhanced by miniature lamps from beads and wire.
Finish all items with thin layers of paint or stain to keep the grain pattern clear. This method makes the wood furniture look real without covering up the details with thick paint.
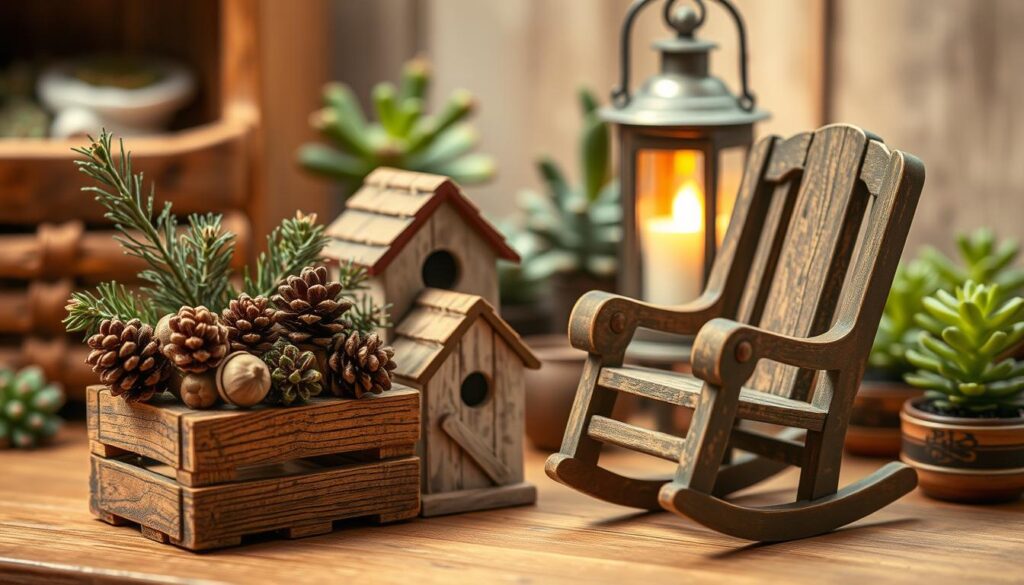
Rustic Home Decor Items at 1:16 Scale
Miniature rustic decor brings cozy farmhouse charm to small spaces. It’s all about adding weathered looks to tiny items. Start with basic shapes and age them with sanding and paint washes.
Small-scale wood signs are great for beginners. Use thin wood and paint with a fine pen or brush. Sand the edges to give them a worn look.
The secret to convincing miniature wooden decorations lies in the details – add tiny nail holes, slight warping, and uneven paint for pieces that look genuinely weathered rather than simply small.
Popular miniature wooden decorations include:
- Ladder shelves scaled to display micro treasures
- Weathered window frames with cross-hatched details
- Tiny crates with realistic wood grain
- Miniature barrels with metal ring details
To age items, start with a dark base coat. Then, brush on lighter shades. For crates and barrels, stain with brown paint. These steps add depth and make items look worn.
Miniature Display Cases and Shadow Boxes
Once you’ve made beautiful 1:16 scale wood crafts, how you show them off matters a lot. Miniature shadow boxes and custom display cases keep your tiny works safe and make them look even better. These special spots not only protect the fine details but also make your miniatures come alive.
Designing Your Display
Start by planning your display cases carefully. Small-scale cases work best when you think about how people will view them. A depth of 3-4 inches is usually just right, not too much for your tiny creations. Add tiny backdrops that match your pieces – like painted skies or wallpapered interiors.
Adding Lighting Elements
Lighting is key to making your display pop. Micro LED lights can be placed to highlight important parts. For a more realistic look, try fiber optic strands for twinkling effects or candlelight. Battery-powered lights keep things tidy, and tiny mirrors can spread light around your display.
Finishing Touches for Professional Results
The look of your display can go from amateur to pro with a few extra steps. Add miniature hinges and clasps for doors that open. Use clear plexiglass for safety and to save weight. Finish the wood with satin or semi-gloss to protect it. You might also want to include nameplates or hidden spots for notes about your miniatures.
Seasonal and Holiday 1 16 Wood Ornaments
Crafting small holiday decorations is a fun way to celebrate all year. Using 1:16 scale lets you create detailed miniatures that are easy to handle. These tiny decorations bring the holiday spirit to life.

Winter Holiday Decorations
Winter is full of chances to make tiny wooden ornaments that shine with holiday magic. You can make 1:16 scale Christmas decorations like tiny trees with small baubles. Or craft small wreaths with green thread and tiny red beads for berries.
Some popular holiday decorations include:
- Miniature sleighs with delicate runners
- Tiny gift boxes wrapped in colorful paper
- Scaled nutcrackers with painted details
Spring and Summer Miniatures
Spring and summer are great for bright colors and natural themes. You can make miniature garden accessories like tiny planter boxes with colorful “flowers” from wooden beads. Beach-themed items also work well, like lawn chairs and umbrellas made from wood and fabric.
Fall-Themed Tiny Wood Crafts
Fall is perfect for rich textures and warm colors in your crafts. You can carve tiny pumpkins from small wood spheres and paint them in orange. Miniature apple barrels are also great, made from thin wood strips and wire “bands.” Tiny scarecrows add autumn charm to dollhouses and display cases all year.
Functional Miniature Storage Solutions
Creating tiny wood organizers makes miniature crafting useful in daily life. These small pieces blend art with practicality. They help keep small items tidy while showing off your skill.
Miniature wooden storage, like jewelry boxes, keeps items like rings and earrings organized. The trick is to make working parts that look good but work well.
Desk organizers are another chance to show off your 1:16 scale furniture. They have tiny drawers for paper clips, thumbtacks, or beads. Wall-mounted shelves at this scale are great for displaying small treasures without taking up much space.
When making practical miniatures, durability is key. Choose hardwoods like maple or walnut for strength. Use waxed drawer slides made from the same wood to keep things looking right.
Finishing these tiny storage solutions with protective sealant helps them last. This way, your craft stays beautiful and functional, fitting well on your desk, vanity, or wall.
Creative Transportation Models with 1 16 Wood
Making transportation models from wood at 1:16 scale is a fun challenge for miniatures fans. These models capture the beauty of old cars and show off woodworking skills. They combine precise cutting with artistic touches to make these small vehicles come alive.
Vintage Cars and Trucks
Building 1:16 scale cars from wood needs careful planning and skill. Use thin basswood or maple for the body parts. Cut out basic shapes with templates of classic car designs.
Sand the curves gently to get smooth surfaces that look like metal. Add wooden wheels that turn and tiny headlights from polished beads for realistic details.
Farm Equipment Miniatures
Model farm equipment is tricky because of its mechanical parts. Use hardwoods like cherry or walnut for tractors and plows. Lighter woods are good for smaller parts.
Use sandpaper and stains to add weathering effects. This makes your farm equipment look used and real.
Railway Accessories and Structures
Miniature wooden trains and railway structures make any model display better. Build train cars with thin basswood for siding and balsa for details. Make tiny depots with working doors and windows using precise cuts.
Water towers and crossing signals add to your railway scene. These trains look great with landscape elements, making complete historical dioramas.
| Model Type | Best Woods | Difficulty Level | Special Techniques |
|---|---|---|---|
| 1:16 Scale Cars | Maple, Basswood | Intermediate | Curved sanding, detail carving |
| Model Farm Equipment | Cherry, Walnut | Advanced | Weathering, moving parts |
| Miniature Wooden Trains | Basswood, Balsa | Beginner to Intermediate | Straight cuts, simple joints |
Tips for Finishing and Preserving Your Miniature Wood Projects
The final steps of finishing your miniature wood projects can make them truly stand out. Begin by sanding with fine-grit paper to smooth out surfaces. This ensures details are not lost. Think about how you plan to use your project when choosing a finish. Display pieces might need different treatments than items you handle a lot.
When sealing your scale models, use thin coats. Small brushes, toothpicks, or cotton swabs work best. For staining, dilute commercial stains to avoid overpowering the wood grain. Remember, miniature pieces need much thinner applications than larger items.
- Oils (linseed, tung): Enhance grain with warm tones
- Waxes: Provide subtle protection with natural feel
- Shellac: Creates traditional amber glow
- Acrylic varnish: Durable, water-resistant finish
Keeping your wooden miniatures in good condition means paying attention to their environment. Keep them away from direct sunlight to prevent fading and damage. Also, maintain moderate humidity to avoid warping or cracking. Dust protection is key for detailed pieces – consider using display cases with glass or acrylic shields.
For dollhouse furniture, regular maintenance is crucial. Apply a fresh coat of finish to high-touch areas every year. When handling valuable or vintage miniatures, wear cotton gloves to prevent oils from damaging the finish. Store loose pieces in acid-free tissue when not on display to keep them in great shape for years.
| Preservation Method | Best For | Maintenance Level |
|---|---|---|
| Display case with UV protection | Valuable collections | Low |
| Acrylic sealant | Frequently handled items | Medium |
| Museum wax | Securing items in displays | High |
Conclusion: Bringing Your 1 16 Wood Crafts to Life
Starting with 1:16 scale woodworking opens a world of endless creativity. Your small creations bring happiness with their detailed designs and the skill in each piece. The miniature woodworking community is full of support and ideas for your next project.
Need 1:16 crafting inspiration? Check out online forums where people share tips and show off their work. Many crafters have blogs with step-by-step guides for beginners. Local clubs also offer workshops to learn from experts.
Keep track of your progress with a miniature wood project gallery. Photos of your work show your achievements and help others in the craft world. Use good lighting and close-up shots to show off the details that make your pieces unique.
Look for specialty shops and scale modeling resources for the best materials. The skills you learn – patience, precision, and creative thinking – are useful in many crafts. Every small wooden piece you make adds to a bigger story, bringing imaginative worlds to life.
Frequently Asked Questions About 1:16 Wood Crafting
Starting your journey in 1:16 wood crafting can raise some questions. Don’t worry, we’ve got answers for you! This FAQ will help you understand the basics of miniature woodworking.
Choosing the right wood is a big question for beginners. Whether it’s for dollhouse furniture or models, the wood matters a lot. We’ll guide you on picking the best wood and how to work with it at 1:16 scale.
Many people struggle with problems like splintering or warping in miniature woodworking. We’ll share tips to fix these issues and keep your projects perfect. We’ll also talk about how to handle sharp tools safely when working on small projects.
For beginner miniature crafting, we have tips on scaling up plans and figuring out material needs. Knowing these basics will help you grow from a beginner to a skilled miniature woodworking artist.
Whether you’re new to 1:16 wood crafting or looking to improve, this FAQ is here to help. Get ready to create amazing miniature pieces with confidence!
FAQ
What types of wood are best suited for 1:16 scale woodworking projects?
Basswood, balsa, and hardwoods like maple, oak, and cherry are top choices. Basswood and balsa are light and easy to shape. Hardwoods, on the other hand, are durable and look more natural.
How do I accurately scale down full-size woodworking plans to 1:16 scale?
Use a scale ruler to measure and convert dimensions. Keep proportions right by adjusting thicknesses and joint sizes. This makes your miniature look real.
What are some essential tools for working with miniature wood at 1:16 scale?
You’ll need sharp X-Acto knives, tiny saws, and clamps. Precision files and high-grit sandpapers are also crucial. Tools like dial calipers and magnifying glasses help with detailed work.
How can I avoid common problems like splintering and warping when crafting 1:16 scale projects?
Choose the right wood and control humidity. Use careful sanding and finishing. A backer board, wood conditioner, and sealing surfaces are key to avoiding problems.
Can 1:16 scale wood crafts be combined with commercially available dollhouse components?
Yes! Mixing custom wood with pre-made dollhouse parts can make stunning scenes. Make sure the proportions and looks match well.
How do I safely handle sharp tools when working with such tiny wood pieces?
Use a magnifying glass or jeweler’s loupe for clear sight. Use stabilizing jigs or clamps for secure cutting or sanding. Take breaks and wear gloves for safe handling.
What are some tips for progressing from beginner to advanced 1:16 scale woodworking?
Start with simple projects to learn basic skills. Move to more complex designs as you get better. Try new techniques and expand your toolset. Online communities and workshops can help you grow faster.
Read also : The Top Pre Engineered Wood Flooring Options for Your Home