When it comes to enhancing the aesthetic appeal and value of your home, choosing the right flooring plays a vital role. Among the myriad options available, 3 inch hardwood flooring has gained popularity for its timeless elegance, versatility, and ability to blend seamlessly into various interior styles. This size strikes a perfect balance—providing enough visual impact without overwhelming the space. Whether you’re remodeling a cozy living room or outfitting an expansive foyer, understanding the nuances of 3-inch hardwood flooring can help you make informed choices that elevate your home’s design.
In this comprehensive guide, we will explore everything about 3 inch hardwood flooring—from its dimensions, aesthetic appeal, and material options to installation techniques and maintenance tips. Dive deep into the world of hardwood flooring to discover how this specific width can transform your living space, adding warmth, character, and sophistication.
Understanding 3-Inch Hardwood Flooring: Dimensions and Aesthetics

Before delving into the specifics, it’s essential to grasp what makes 3 inch hardwood flooring unique in terms of size, appearance, and overall contribution to interior design. The width of hardwood planks significantly influences the visual flow, perception of space, and overall ambiance of a room. Recognizing these factors helps homeowners select the most suitable flooring type to match their style preferences and functional needs.
What is 3-Inch Hardwood Flooring?
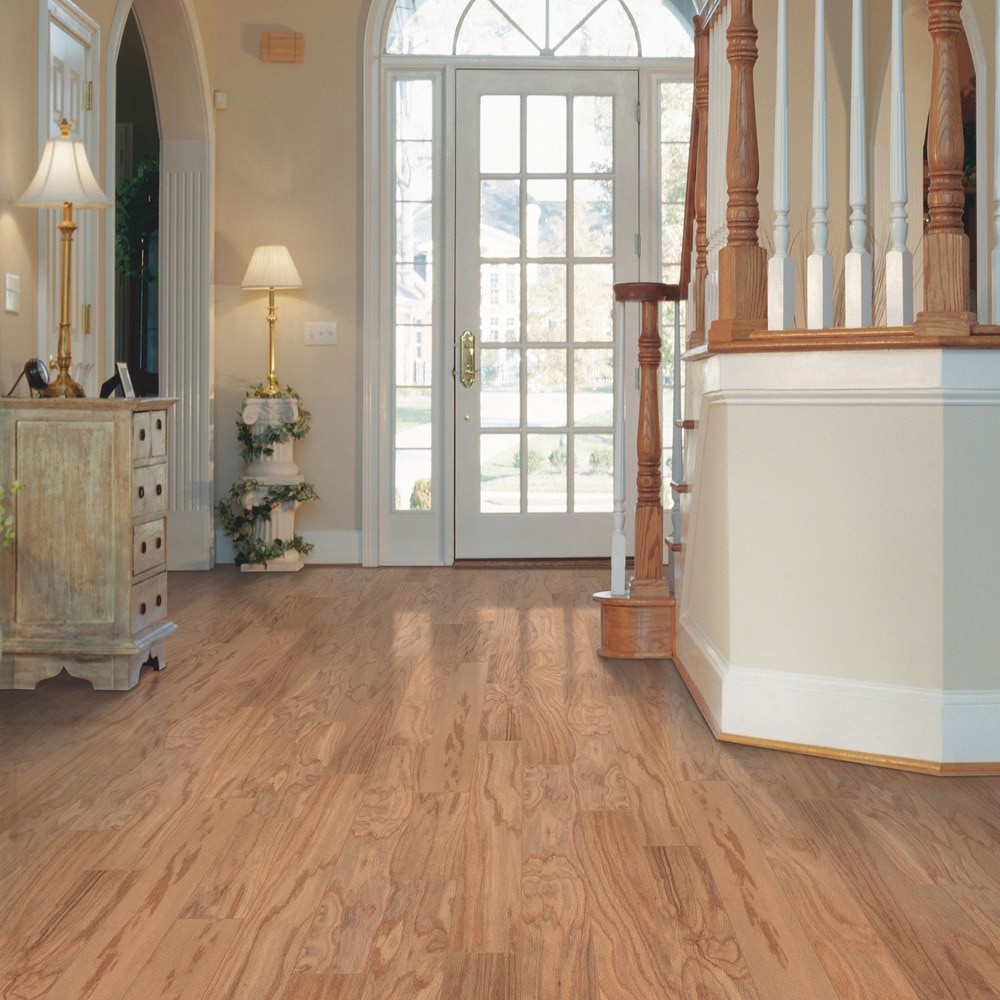
3 inch hardwood flooring refers to wooden planks that are approximately three inches wide measured from edge to edge. Unlike wider or narrower boards, the three-inch dimension offers a balanced look, providing enough surface area to showcase the wood’s natural grain while maintaining a proportionate appearance in most rooms. These planks are usually available in both prefinished and unfinished formats, making them versatile for various projects.
This size is particularly favored for traditional and transitional interiors where a classic yet contemporary aesthetic is desired. It balances the rustic charm of wider planks and the sleekness of narrower strips, resulting in a warm, inviting environment. The 3-inch width also minimizes visual clutter, especially in rooms with lower ceilings or smaller footprints, ensuring the space remains open and elegant.
Defining the Dimension: Precise Measurements and Terminology Explained
The term “3 inch” in hardwood flooring denotes the plank width, but it’s useful to understand how this measurement fits into broader flooring terminology. Typically, hardwood flooring comes in a range of widths, from narrow strips (around 2 inches) to wide planks (over 6 inches). The 3-inch width is considered a medium size—larger than traditional strip flooring (about 1-1.5 inches) but narrower than wide plank styles.
Exact measurements can vary slightly due to manufacturing tolerances, so always check product specifications. Some brands may offer planks that measure exactly three inches, while others might be slightly more or less, such as 2.75 or 3.25 inches. The key is consistency within a flooring installation to ensure a harmonious appearance.
The terminology associated with hardwood flooring also includes terms like plank width, thickness, and length. While width influences aesthetics, thickness affects durability and installation methods. Typical thicknesses range from 3/4 inch to 1 inch, with 3/4 inch being standard for residential floors. Lengths vary from short sections to long, continuous planks, which can further influence the overall look when combined with a 3-inch width.
Common Wood Species in 3-Inch Widths: Oak, Maple, Hickory, and More
Selecting the right species is fundamental in achieving the desired durability, appearance, and maintenance profile. Several popular hardwoods are commonly manufactured in 3-inch widths, each offering distinct characteristics and visual traits.
- Oak: Perhaps the most prevalent choice, oak provides excellent durability, a prominent grain pattern, and a warm tone. It is highly versatile, suitable for various interior styles from rustic to modern.
- Maple: Known for its fine, consistent grain and light color, maple lends a sleek, contemporary look. It’s harder than oak, making it ideal for high-traffic areas.
- Hickory: Characterized by its dramatic grain and color variations, hickory offers a rustic, distinctive aesthetic. Its hardness makes it highly durable, resistant to dents.
- Walnut: Valued for its rich, dark hue and smooth grain, walnut adds luxury and depth to any space, though it may require more maintenance to keep its finish.
- Cherry: With its warm reddish tones that deepen over time, cherry brings a refined elegance and soft patina, suitable for formal settings.
- Exotic woods: Species like Brazilian teak or tigerwood are occasionally available in 3-inch widths, offering unique patterns and colors but often at higher costs.
Each wood species has its personality, so selecting the right one hinges on your aesthetic preferences, lifestyle, and maintenance considerations.
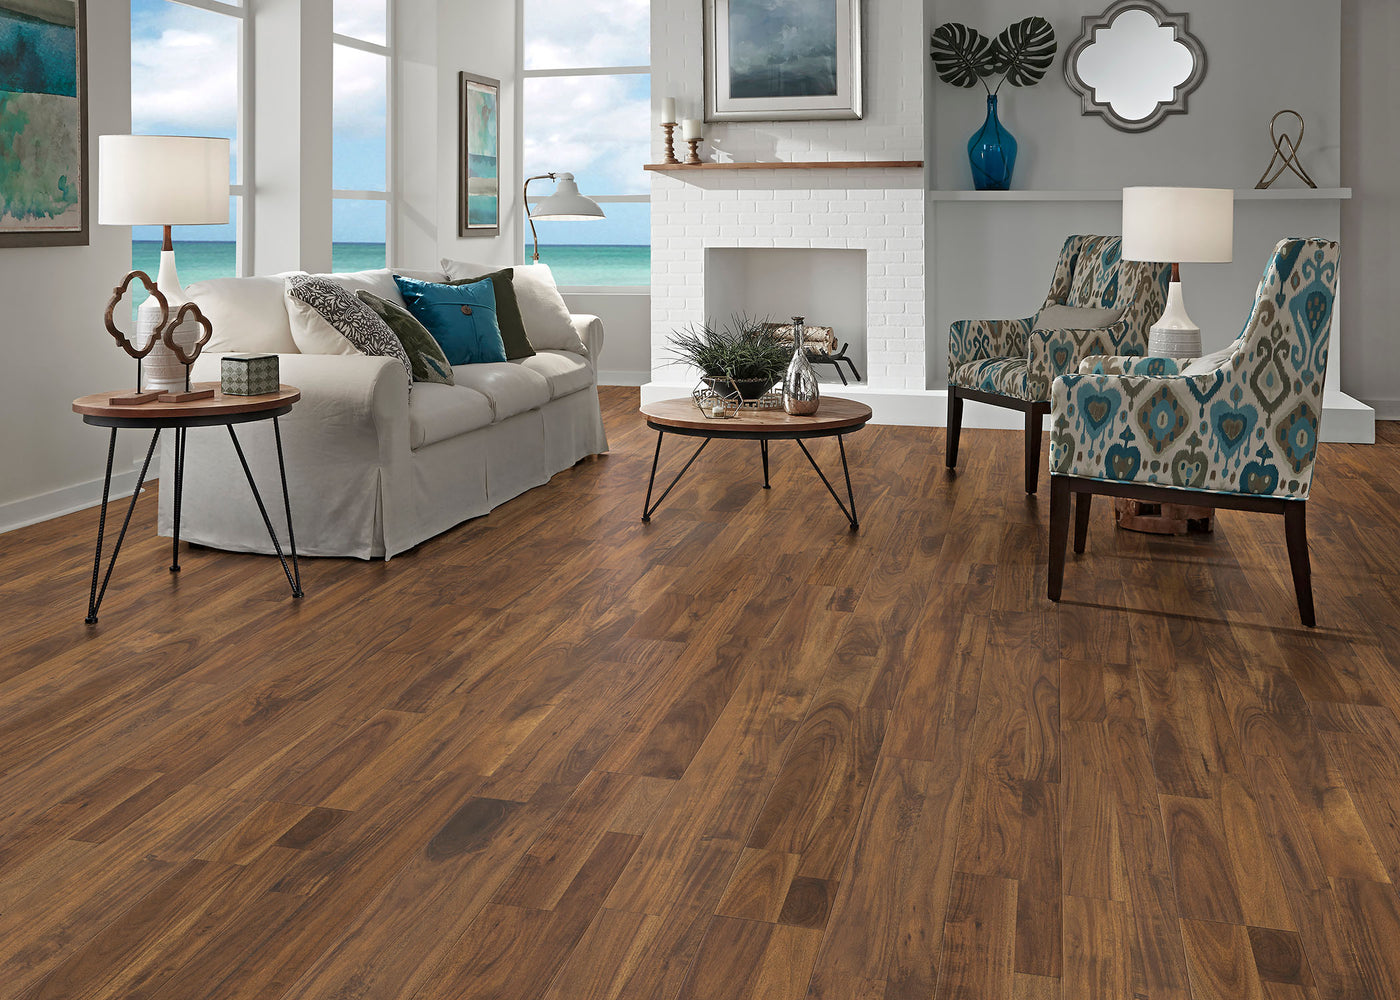
Visual Appeal: Understanding How 3-Inch Planks Enhance Room Aesthetics
The visual impact of 3 inch hardwood flooring stems from how the planks’ size interacts with the room’s proportions and decor elements. Medium-width planks create a balanced and cohesive look, allowing the natural grain and texture of the wood to shine through without overpowering the space.
In rooms with low ceilings, 3-inch planks help avoid a crowded or cramped effect, making the ceiling appear taller and the space more open. Conversely, in larger rooms, they add a sense of proportion and sophistication without seeming overwhelming. The moderate width also facilitates various installation patterns, such as straight, diagonal, or herringbone, providing versatility in design.
Additionally, the natural variation in grain and knots visible in many wood species becomes more prominent in 3-inch planks, adding character and depth to the flooring. This richness enhances the overall ambiance, making each room feel warm, inviting, and stylistically cohesive.
Comparing 3-Inch to Other Widths: Advantages and Disadvantages of This Popular Size
Every width of hardwood flooring presents its own set of advantages and challenges. When compared to narrower or wider planks, 3-inch hardwood flooring strikes a compelling balance.
| Aspect | Narrower Boards (1-2 inches) | 3-Inch Boards | Wider Boards (4-6+ inches) |
|---|---|---|---|
| Visual Impact | Subtle, detailed grain pattern | Balanced, prominent grain | Bold statement, expansive look |
| Room Size Effect | Suitable for small spaces | Ideal for multiple room sizes | Can shorten the appearance in small rooms |
| Ease of Installation | Easier in tight spaces due to flexibility | Moderate difficulty | Requires more precise acclimation and handling |
| Cost | Generally less expensive per plank | Moderate price point | Usually more costly |
| Maintenance | Less prone to movement | Stable if installed properly | Greater potential for expansion/contraction |
Advantages of 3-inch hardwood flooring include its versatility, ease of handling during installation, and ability to complement a broad range of interior styles. Unlike wider planks, which can be more challenging to install and may cause more expansion issues, 3-inch planks tend to be more forgiving and adaptable.
On the downside, narrower planks might not showcase the full character of highly figured woods or pronounced grains, and they may appear busy in very small or minimalist spaces. Wider planks provide a more luxurious, seamless look but require careful acclimation and can be more sensitive to moisture changes.
Ultimately, the choice hinges on personal preference, room size, and aesthetic goals. The 3-inch size stands out as a practical, stylish option that offers a middle ground between tradition and contemporary appeal.
Choosing the Right 3-Inch Hardwood Flooring: Species, Grade, and Finish
Selecting the perfect 3 inch hardwood flooring involves considering multiple factors beyond just size. From the wood species and grade to finishing options, each decision impacts the durability, appearance, cost, and maintenance of your floor. Here, we explore how to choose materials and finishes wisely to match your lifestyle and interior design vision.
Selecting the Perfect Wood Species: Considerations for Durability, Grain, and Color
The choice of wood species directly influences the flooring’s strength, aesthetic appeal, and how well it ages over time. When selecting 3 inch hardwood flooring, it’s essential to match the species’ properties with the room’s traffic levels, environment, and your personal style.
Durability is a primary concern, especially in high-traffic areas or homes with children and pets. Hardwoods like oak, hickory, and maple excel in resisting scratches and dents, making them excellent choices for busy households. Softwoods or less dense species may require more maintenance and care.
Grain pattern and color contribute significantly to the visual charm of your flooring. For example, oak features a prominent and varied grain that adds character, while maple offers a smoother, more uniform appearance. Hickory’s contrasting tones and irregular grain lend a rustic, lively vibe. Exotic woods provide unique colors and patterns but often come at a premium.
Environmental considerations, such as sustainability and sourcing, are also important. Opting for certified sustainably harvested woods ensures eco-friendliness without compromising quality.
Oak – Benefits, Varieties (Red and White), and Suitability for Different Spaces
Oak remains the most popular hardwood choice for flooring, especially in the 3-inch format, due to its impressive durability, widespread availability, and classic appearance. The two main varieties—red oak and white oak—each have distinct qualities suited for different applications.
Red oak boasts a warm, reddish hue with a prominent grain pattern. It’s slightly softer than white oak but still offers excellent resistance to wear and tear. Its vibrant color and grain make it an excellent choice for living rooms, hallways, and kitchens, where durability and aesthetic warmth are desired. Red oak responds well to staining, allowing customization to match various interior palettes.
White oak features a more subdued color palette—ranging from light tan to grey—and a tighter, finer grain. It is generally denser and more resistant to moisture, making it suitable for basements, bathrooms, or humid environments. Its neutral tones complement both traditional and contemporary designs, and it tends to age gracefully, developing a pleasing patina over time.
Both oak variants perform well under foot traffic and resist denting, especially when finished with durable topcoats. Their versatility makes them a staple in residential and commercial settings alike.
Maple – Advantages, Grain Patterns, and Considerations for Staining
Maple hardwood flooring offers a sleek, modern aesthetic characterized by its fine, consistent grain and light coloration. It is prized for its strength and smooth appearance, which allows for crisp, clean designs in contemporary interiors.
One of the primary advantages of maple is its hardness—second only to hickory among domestic woods—making it highly resistant to dents and scratches. This resilience makes maple ideal for areas with high activity levels, including playrooms, staircases, and entryways.
The grain pattern of maple is subtle, featuring little visible grain lines or knots, lending a uniform surface that reflects light beautifully, brightening spaces. Its natural pale hues serve as an excellent backdrop for various stains, although light finishes are often preferred to preserve its natural appearance.
When staining maple, caution is necessary because it tends to absorb stain unevenly, sometimes producing blotchiness. Pre-conditioning the wood before staining or choosing water-based, transparent finishes can mitigate this issue. Proper sealing and finish application enhance its durability and maintain its pristine look over the years.
Hickory – Durability, Distinctive Look, and Appropriate Applications
Hickory is renowned for its exceptional hardness, making it one of the most durable domestic hardwoods on the market. Its rugged appearance and striking grain patterns give it a distinctive rustic charm that appeals to homeowners seeking a natural, earthy aesthetic.
The color spectrum of hickory ranges from creamy whites to rich browns with darker streaks, creating a lively and textured visual effect. This variability in tone and pattern means that each plank is unique, contributing to a dynamic and authentic look.
Due to its toughness, hickory is suitable for high-traffic areas such as open-concept living spaces, commercial settings, and even outdoor decks when properly sealed. Its resistance to dents and scratches ensures longevity, making it a cost-effective investment in the long run.
However, hickory’s density can pose challenges during installation, requiring specialized tools and techniques. Additionally, its bold appearance may not suit minimalistic or contemporary interiors but excels in rustic, country, or farmhouse-style homes.
Other Wood Options: Walnut, Cherry, and Exotic Choices
While oak, maple, and hickory dominate the market, other wood options offer unique aesthetics and performance traits:
- Walnut: Rich, dark brown hues with a smooth grain, walnut exudes luxury and sophistication. It is softer than oak and hickory, requiring attentive maintenance but providing an unmistakable upscale look.
- Cherry: Famed for its warm reddish tones that deepen over time, cherry offers a refined, elegant appearance. It’s moderately hard, suitable for bedrooms, offices, and formal dining rooms.
- Exotic woods: Species like tigerwood, Brazilian teak, and rosewood present striking colors and patterns. While visually stunning, they often come at a higher cost and may involve sustainability concerns.
Choosing exotic options requires careful consideration of environmental impact, compatibility with indoor climates, and budget constraints.
Understanding Hardwood Grades: Clear, Select, Common, and Rustic
Hardwood grading determines the visual qualities of the planks, influencing appearance and price. Each grade offers a different level of natural imperfections, knots, and coloration, enabling homeowners to select based on aesthetic preferences and budgets.
Clear Grade: Minimal Knots and Imperfections, Ideal for a Uniform Look
Clear grade hardwood showcases nearly flawless planks with minimal to no knots, pinholes, or blemishes. This grade provides a sleek, uniform appearance, perfect for modern or Scandinavian interiors emphasizing simplicity and elegance. It allows the natural beauty of the wood grain to stand out without distraction.
Because these floors require stringent grading standards, they are typically more expensive. However, their consistent look simplifies matching and finishing, reducing the need for extensive repairs or touch-ups later.
Select Grade: Few Small Knots and Slight Variations, Providing Slight Character
Select grade offers a good balance between uniformity and character. It contains a limited number of small knots, minor color variations, and slight grain inconsistencies, which add visual interest without overwhelming the look. This grade suits homeowners who desire a natural aesthetic with some character, ideal for transitional styles.
It’s more affordable than clear grade and easier to work with during installation, as minor imperfections are less conspicuous.
Common Grade (No. 1 and No. 2): More Knots and Variations, Showcasing Natural Character
Common grades embrace the natural diversity of wood, featuring visible knots, mineral streaks, and color variations. The rustic appeal of these floors adds warmth and authenticity, fitting well with farmhouse, country, or vintage-inspired interiors.
These grades are more cost-effective but require acceptance of natural imperfections that can add charm or, if not carefully selected, detract from a polished look.
Rustic Grade: Significant Knots, Color Variations, and Imperfections for a Unique Aesthetic
Rustic grade emphasizes the natural features of wood, celebrating knots, cracks, and color streaks. The result is a highly textured, distinctive floor that acts as a focal point in any room. It’s suited for casual, eclectic, or rustic-themed interiors where character takes precedence over uniformity.
Despite its rougher appearance, rustic grade hardwood is typically finished with durable coatings to withstand daily wear.
Exploring Different Finishes: Prefinished vs. Unfinished
The finishing process greatly impacts the durability, appearance, and installation timeline of 3 inch hardwood flooring. Two main options exist: prefinned and unfinished flooring, each with pros and cons.
Prefinished: Advantages of Durability, Convenience, and Consistent Look
Prefinished hardwood arrives with a factory-applied coat of polyurethane or similar protective layer. This approach offers several advantages:
- Immediate use: Floors are ready to walk on immediately after installation, reducing downtime.
- Consistent finish: Factory conditions ensure uniformity in sheen, color, and protection.
- Enhanced durability: High-quality factory finishes often outperform site-applied coatings in scratch and stain resistance.
- Lower VOC emissions: Modern prefinished products use environmentally friendly finishes, improving indoor air quality.
However, the limitation lies in the inability to customize the stain or finish after installation. Also, the edges of prefinished planks may be beveled, affecting the overall aesthetic in certain styles.
Unfinished: Customization Options, Allowing for Personalized Staining and Finishing
Unfinished hardwood provides the flexibility for custom staining, finishing, or blending with existing decor. Homeowners or contractors can choose the exact sheen, color, and protective coating suited to their preferences.
Advantages include:
- Customization: Tailoring the finish to match specific interior schemes.
- Sanding and refinishing: Easier to repair or recoat over the life of the floor.
- Seamless appearance: No beveled edges, resulting in a smooth surface ideal for certain design styles.
The drawbacks involve longer installation times, mess from finishing work, and exposure to fumes during curing. It’s best suited for experienced DIYers or professional installations.
Finish Types: Polyurethane, Oil-Based, Water-Based, and Their Characteristics
The protective topcoat defines the durability and maintenance profile of your hardwood floor. Popular options include polyurethane, oil-based, and water-based finishes.
- Polyurethane: Widely used for its excellent durability, chemical resistance, and variety of sheens from matte to high-gloss. Available in oil-based and water-based formulations.
- Oil-based finishes: Penetrate deeper into the wood, providing a warm glow, but tend to yellow over time. They are more durable but may require longer drying times.
- Water-based finishes: Offer clearer, non-yellowing protection with faster drying times. They are environmentally friendly and easier to clean up but may be less resistant to scratches than oil-based options.
Selection depends on desired appearance, environmental considerations, and maintenance expectations.
Texture and Sheen: Smooth, Hand-Scraped, Matte, Semi-Gloss, and High-Gloss Options
The surface finish and sheen affect the tactile experience and visual appeal:
- Smooth: Classic, glossy, or matte surfaces with a sleek feel.
- Hand-scraped: Textured to mimic handcrafted, rustic wood; adds character and hides imperfections.
- Matte: Low sheen reduces glare, creating a sophisticated, understated look.
- Semi-gloss: Balances sheen and durability, suitable for general living areas.
- High-gloss: Reflective surface that enhances vibrancy but shows scratches more easily.
Your choice should align with your interior style and practicality needs.
Installation of 3-Inch Hardwood Flooring: Methods and Considerations
Proper installation is critical to maximizing the lifespan and appearance of your 3 inch hardwood flooring. Understanding various installation methods and preparation steps ensures a smooth process and long-lasting results.
Preparing the Subfloor: Ensuring a Level and Stable Surface
A solid, level subfloor is the foundation for any hardwood installation. Prior to laying down your 3-inch planks, inspecting the subfloor for flatness, cleanliness, and stability is essential.
Begin by removing all debris, dust, and loose materials. If there are uneven spots exceeding a quarter of an inch, sanding or leveling compounds may be necessary. In cases of significant damage or instability, replacing sections or reinforcing the subfloor ensures proper support.
In multi-story homes or above unconditioned spaces like garages, addressing temperature and humidity variations beforehand stabilizes the subfloor environment, preventing future warping or gaps.
Inspection: Identify and Address Any Subfloor Imperfections or Moisture Issues
Moisture is one of the biggest threats to hardwood flooring longevity. Use a moisture meter to assess the moisture content of both the subfloor and the hardwood planks. Ideally, the difference should not exceed a few percentage points.
Any signs of mold, rot, or water damage require remediation before installation. Leaking pipes, poor ventilation, or recent flooding must be addressed to prevent future problems.
Identifying imperfections such as dips, humps, or loose sections allows for targeted repairs, ensuring a sturdy, even surface.
Leveling: Techniques for Creating a Perfectly Level Base
Even minor dips or humps can cause issues such as squeaks, gaps, or uneven wear. To achieve a perfectly level base, consider using self-leveling underlayments, grinding down high spots, or shimming low areas.
For concrete subfloors, applying a leveling compound provides a smooth, stable surface. Wooden subfloors may require sistering or sister joists for added support.
Always follow manufacturer guidance regarding moisture barriers and drying times. An immaculate subfloor sets the stage for a smooth, professional-looking finish.
Moisture Barrier: The Importance of Protecting the Hardwood from Moisture Damage
Installing a moisture barrier beneath your 3 inch hardwood flooring defends against vapor transmission, which can cause cupping, buckling, or mold growth.
Types of barriers include polyethylene sheets, foam underlayments, and vapor-retardant membranes. The choice depends on the subfloor type, room usage, and local climate.
Ensure the barrier overlaps seams and extends up the walls to provide a complete seal. Proper installation prevents moisture-related issues, safeguarding your investment for years to come.
Installation Methods: Nailing, Gluing, and Floating
Three primary installation techniques are used for hardwood flooring—each suited to different substrates, preferences, and scenarios.
- Nailing: The traditional method involves securing planks to a wooden subfloor using nails or staples. It offers strong attachment, especially suitable for tongue-and-groove planks. Proper nailing ensures minimal movement and squeaking.
- Gluing: Applying adhesive to the subfloor creates a stable bond. This method is common in concrete subfloors or when minimizing noise transmission is desired. Using the right glue for hardwood ensures optimal adhesion and flexibility.
- Floating: The planks are laid over an underlayment and connected via click-lock systems or adhesives without being nailed or glued to the subfloor. It’s quick, easy, and ideal for DIY projects or spaces where subfloor imperfections exist.
Your choice depends on the subfloor, room conditions, and personal skill level.
Step-by-Step Installation Guide: A General Overview of the Process
While detailed procedures vary, the general steps include:
- Acclimate the wood: Store planks in the installation environment for several days to stabilize moisture content.
- Plan layout: Decide on orientation, starting point, and expansion gaps.
- Prepare subfloor: Ensure it is level, clean, and dry.
- Install moisture barrier: Lay down vapor protection.
- Lay first row: Use spacers to maintain expansion gaps.
- Continue laying planks: Secure via nailing, gluing, or clicking into place.
- Cut and fit: Measure and cut planks for edges and around obstacles.
- Finish edges: Install baseboards, quarter round, or thresholds.
- Clean and inspect: Remove debris and check for gaps or loose boards.
Following a methodical approach ensures a professional finish.
Acclimation: Allowing the Wood to Adjust to the Environment Before Installation
Wood is hygroscopic, meaning it absorbs and releases moisture based on ambient conditions. Proper acclimation minimizes post-installation movement such as gapping or buckling.
Store the hardwood in the installation area for at least three to seven days prior to laying. Maintain normal indoor temperature and humidity levels, ideally between 60-80°F and 35-55% humidity.
During this period, keep the planks stacked flat, separated to allow airflow, and away from direct sunlight or sources of heat and moisture. This process ensures the wood reaches equilibrium with the environment, resulting in a stable, long-lasting floor.
Layout: Planning the Layout to Minimize Waste and Achieve a Desired Aesthetic
Thoughtful planning maximizes material use and creates an attractive pattern. Determine the direction of planks—parallel to the longest wall or to the main light source—to create the illusion of space.
Use chalk lines or laser guides to mark straight installation lines. Calculate plank lengths and cuts to minimize waste, and consider symmetry and pattern continuity, especially at doorways and transitions.
In rooms with irregular shapes, plan for proper fitting around obstacles, and decide whether to center the planks or align them along a specific wall. Good planning reduces excess waste and enhances visual harmony.
Cutting and Fitting: Precise Cuts for Seamless Transitions and Borders
Accurate measuring and cutting are crucial for a seamless appearance. Use quality saws—such as miter, circular, or jigsaws—to achieve clean cuts.
Measure twice, cut once. Be mindful of expansion gaps along walls and around fixtures. Use spacers to keep gaps consistent.
Fitting involves dry-laying planks to visualize layout, then cutting to size for edges and corners. Use scrap pieces creatively for small cuts or repairs.
Finishing Touches: Installing Baseboards, Quarter Round, and Thresholds
After laying the flooring, complete the look with trim and molding. Baseboards cover expansion gaps and add a finished appearance.
Quarter round or shoe molding can hide gaps between the floor and wall, accommodating any minor expansion or contraction.
Thresholds transition the hardwood to other flooring types or rooms. Choose appropriate profiles for a cohesive look and secure them firmly.
Maintaining and Caring for 3-Inch Hardwood Floors: Ensuring Longevity
Proper maintenance is vital to preserving the beauty and integrity of 3 inch hardwood flooring over time. Regular cleaning routines and preventative measures protect your investment from scratches, water damage, and wear.
Regular Cleaning: Preventing Scratches and Maintaining Shine
Routine cleaning keeps dirt and debris from scratching the surface and maintains the luster of the finish. Establish a weekly cleaning schedule tailored to your household’s activity level.
Use gentle tools like microfiber dust mops or soft-bristled vacuums. Avoid sweeping with harsh bristles that can scrape the surface. Regular dusting prevents abrasive particles from settling into the finish.
Implementing consistent cleaning habits prolongs the life of the finish, preserves color vibrancy, and keeps your floors looking fresh.
Dusting and Vacuuming: Removing Dirt and Debris Regularly
Dirt and grit act as tiny abrasives, wearing down the finish over time. Daily vacuuming or dusting in high-traffic areas prevents buildup.
Choose vacuums equipped with hardwood-friendly settings or soft brush attachments. Avoid using vacuums with beater bars or aggressive brushes that could scratch the surface.
Pay special attention to corners, edges, and around furniture. Regular removal of debris minimizes surface scratches and extends the intervals between deeper cleanings.
Mopping: Using a Damp Mop with a pH-neutral Cleaner Designed for Hardwood
Occasional damp mopping restores shine and removes stubborn dirt. Use a microfiber mop dampened with a solution specifically formulated for hardwood floors.
Avoid excessive water or soaking, as standing moisture can cause swelling or warping. Wring the mop thoroughly before use, ensuring it is just damp, not wet.
Apply cleaner evenly, following manufacturer instructions. Dry the floor immediately with a clean, dry cloth if necessary to prevent streaks or water marks.
Avoiding Harsh Chemicals: Protecting the Finish from Damage
Many household cleaners contain vinegar, ammonia, bleach, or citrus acids that may dull or damage hardwood finishes. Always opt for products labeled safe for wood floors.
Stick to pH-neutral cleaners designed expressly for hardwood surfaces. Read labels carefully, and test new products on a small inconspicuous area before full use.
Regularly inspecting cleaning supplies ensures your routine maintains the integrity and appearance of your 3 inch hardwood flooring.
Preventing Scratches and Dents: Protecting the Floor from Daily Wear and Tear
Prevention is the best strategy for keeping your floors pristine. Place felt pads under furniture legs to avoid scratches when moving pieces.
Encourage family members and guests to remove shoes—preferably avoiding high heels and sharp objects—that can cause dents and gouges.
Keep pet claws trimmed to prevent accidental scratches. Use rugs or mats in high-traffic zones to distribute weight and reduce direct contact.
Incorporate gentle handling practices and protective measures to extend the life and beauty of your is 3 inch hardwood flooring.
Furniture Pads: Using Furniture Pads to Protect the Floor from Scratches
Furniture pads are inexpensive, easy-to-install accessories that prevent heavy or moving furniture from scratching or gouging the surface.
Apply felt pads or rubber coasters under legs and bases, especially for items frequently moved. Regularly check and replace worn pads for maximum protection.
Strategic placement of pads minimizes damage during everyday activities, keeping your floors looking flawless.
Area Rugs: Placing Rugs in High-Traffic Areas to Reduce Wear
Area rugs safeguard flooring in zones prone to heavy foot traffic, such asentryways, hallways, and living rooms. Choose rugs with non-slip backing to prevent slipping and shifting.
Cleaning underneath rugs regularly prevents accumulation of dirt and moisture, which can lead to mold or discoloration.
Opt for breathable, natural fiber rugs to avoid trapping moisture. Runners and mats near sinks or entry doors are particularly effective.
Using rugs strategically prolongs the life of your 3 inch hardwood flooring and adds decorative flair.
Avoiding High Heels and Sharp Objects: Preventing Dents and Gouges
Heel marks and sharp objects are common culprits of floor damage. Educate household members and visitors about removing high heels before walking on the floor.
Place protective pads under furniture that is heavy or frequently moved. Be cautious with toys, shopping carts, or other sharp-edged items.
Maintaining awareness reduces accidental damages, preserving the smooth, unmarred surface of your hardwood floors.
Addressing Common Issues: Scratches, Dents, and Water Damage
Despite preventive efforts, issues inevitably arise. Early intervention minimizes repair costs and restores aesthetics.
Scratches: Light scratches can often be buffed out using polishing compounds or repair kits. Deeper scratches may require filling with wood filler or replacing individual planks.
Dents: Lifting dents involves steaming the area with a damp cloth and applying gentle heat, or using specialized dent repair tools.
Water Damage: Immediate action includes wiping spills, removing standing water, and ventilating the area. For severe damage, professional refinishing or replacement may be necessary.
Regular inspections facilitate timely repairs, ensuring your 3 inch hardwood flooring remains beautiful and functional.
Scratch Repair: Techniques for Repairing Minor Scratches
Minor scratches can be addressed with simple DIY methods. First, clean the affected area thoroughly. Then, apply a matching wood stain or touch-up pen designed for hardwood floors.
For superficial scratches, rubbing a walnut or applying a paste of baking soda and olive oil can help fill the scratch and blend it with surrounding wood. Commercial scratch repair kits often include fillers and finishes that restore the surface seamlessly.
If scratches are widespread or deep, sanding and refinishing may be required to restore uniformity. Regular maintenance and preventive measures are key to minimizing damage.
Dent Removal: Methods for Lifting Dents Using Steam or Heat
Dealing with dents involves reversing the compression of the wood fibers. One popular technique is applying steam through a damp cloth placed over the dent, combined with gentle pressure or a soft cloth to lift the fibers.
Alternatively, using a heat gun at a safe distance can loosen the fibers, which can then be gently pushed back into place with a plastic putty knife or similar tool.
In cases of significant dents, professional restoration involving sanding and refinishing may be the best course. Prompt action reduces the extent of cosmetic repairs needed.
Water Damage Mitigation: Steps to Take When Dealing with Water Spills or Leaks
Water is the most destructive element for hardwood floors if not addressed promptly. Immediate steps include:
- Wiping up spills quickly with a dry cloth.
- Removing standing water with towels or a wet/dry vacuum.
- Ventilating the area to facilitate evaporation and prevent mold growth.
- Raising the humidity levels in the room temporarily to reduce shrinkage.
For persistent moisture or large leaks, consult a flooring specialist to assess damage. In severe cases, partial or complete removal and replacement of affected planks are necessary.
Regular inspection, prompt response to spills, and preventive measures like protective mats help maintain your 3 inch hardwood flooring for decades.
Conclusion
Investing in 3 inch hardwood flooring offers a timeless, versatile, and aesthetically pleasing foundation for any interior. Its balanced width complements various design styles, from traditional to contemporary, while providing ease of installation and maintenance. By carefully selecting the right wood species, grade, and finish, you can customize your floors to suit your lifestyle and taste.
A proactive approach to installation, such as thorough subfloor preparation and proper acclimation, ensures longevity and stability. Regular cleaning, use of protective pads, and swift repairs when issues arise preserve the beauty and integrity of your flooring for years to come.
Whether renovating a cozy apartment or designing a grand estate, 3 inch hardwood flooring can elevate your home’s ambiance with warmth, character, and enduring style. Embrace the craftsmanship and natural allure of hardwood, and enjoy the timeless elegance it brings to your living space.
Read also : Wide Plank Oak Wood Flooring